Building of Fringelab, part 3

Written by peterkienle on November 29, 2016

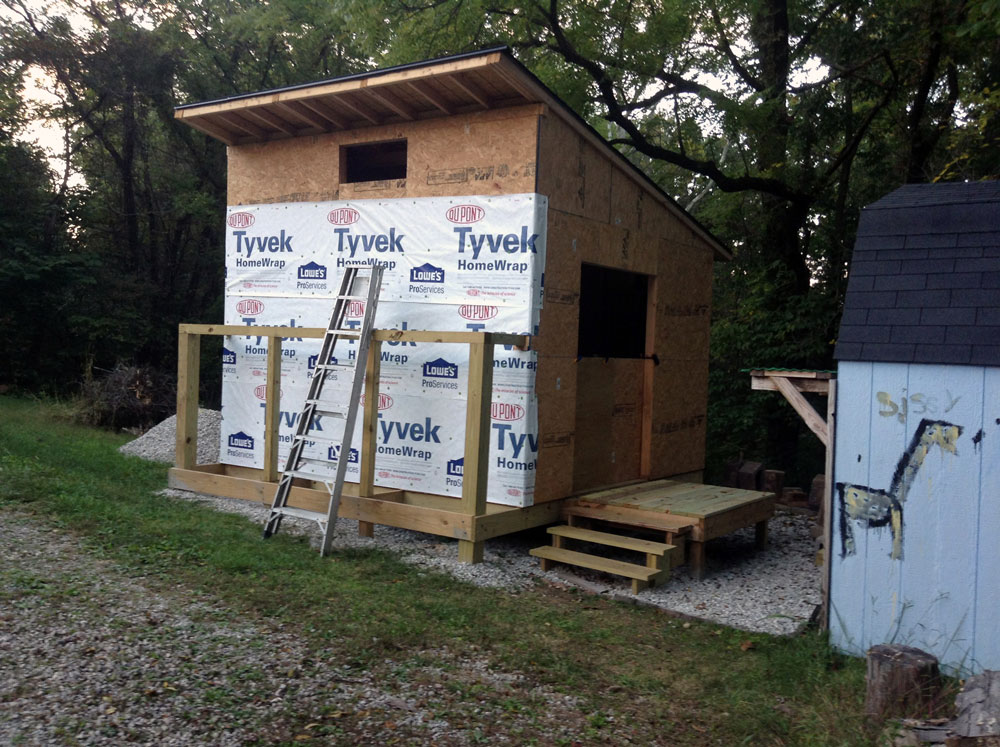
Even though you sometimes see buildings and trailers wrapped with this Tyvek stuff exposed for longer periods – maybe the funds ran out before adding the siding – I liked to have a little more protection from the elements. As per recommendation by my good friend and indispensable advisor Dave Weber, I decided to use cement fiber board. I borrowed the truck once again to get a load of 4×8’ plywood panels for the interior and about 50 7”x14’ cement fiber planks. I thought loading these on the truck would be easy. But they are just about 6′ longer than the truck bed. And these panels are very elastic – or “floppy”. I wasn’t worried I would loose my load like a few months ago but going through potholes the boards would swing vertically enough to touch the road. But I made it home.

The key, again, was to figure out a way how to hold these 14’ boards up with one hand, at the correct vertical distance to the previous board, and keep it straight, while being high on a ladder – and then lift the nailer and pull the trigger… My muscles were very sore for a few days (I lost about 8 pounds of weight, too.)

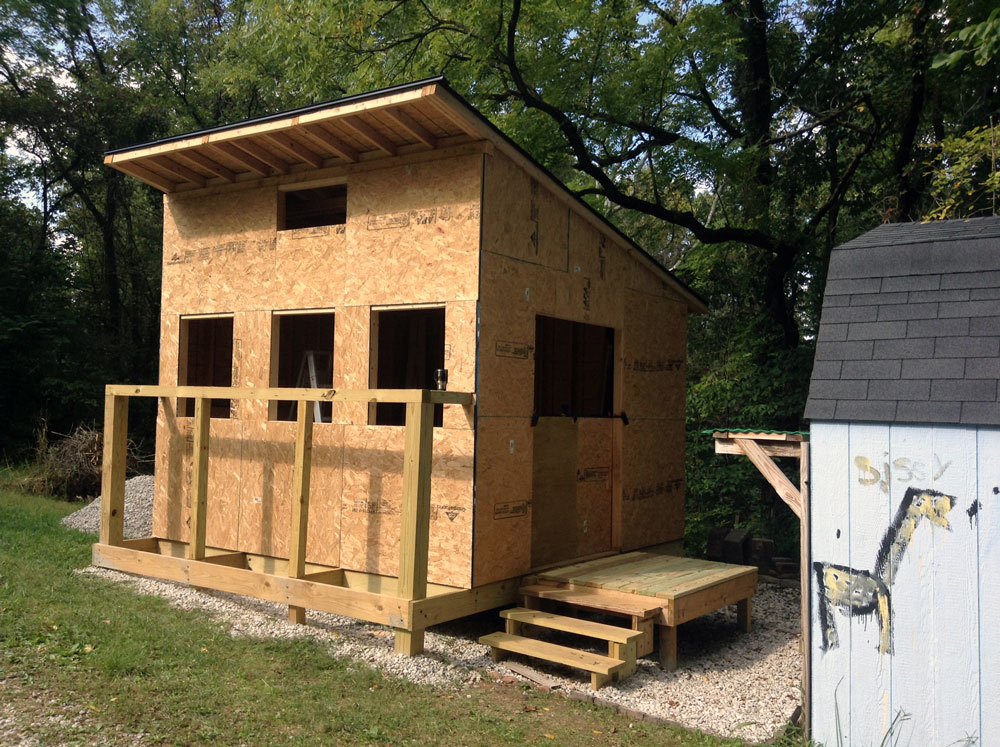
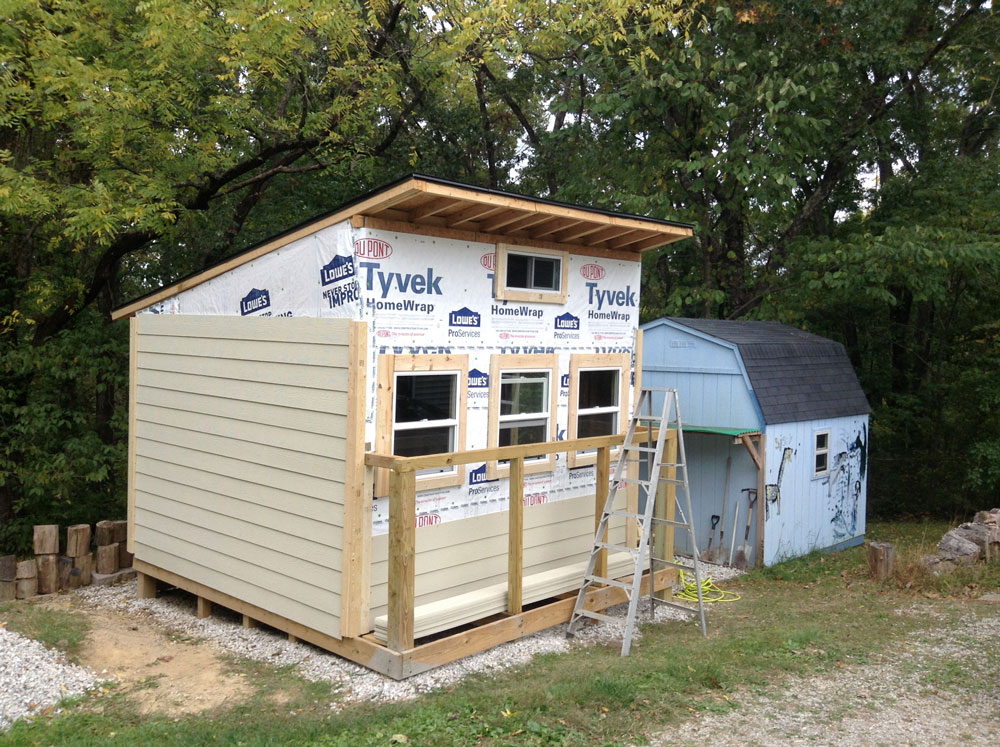
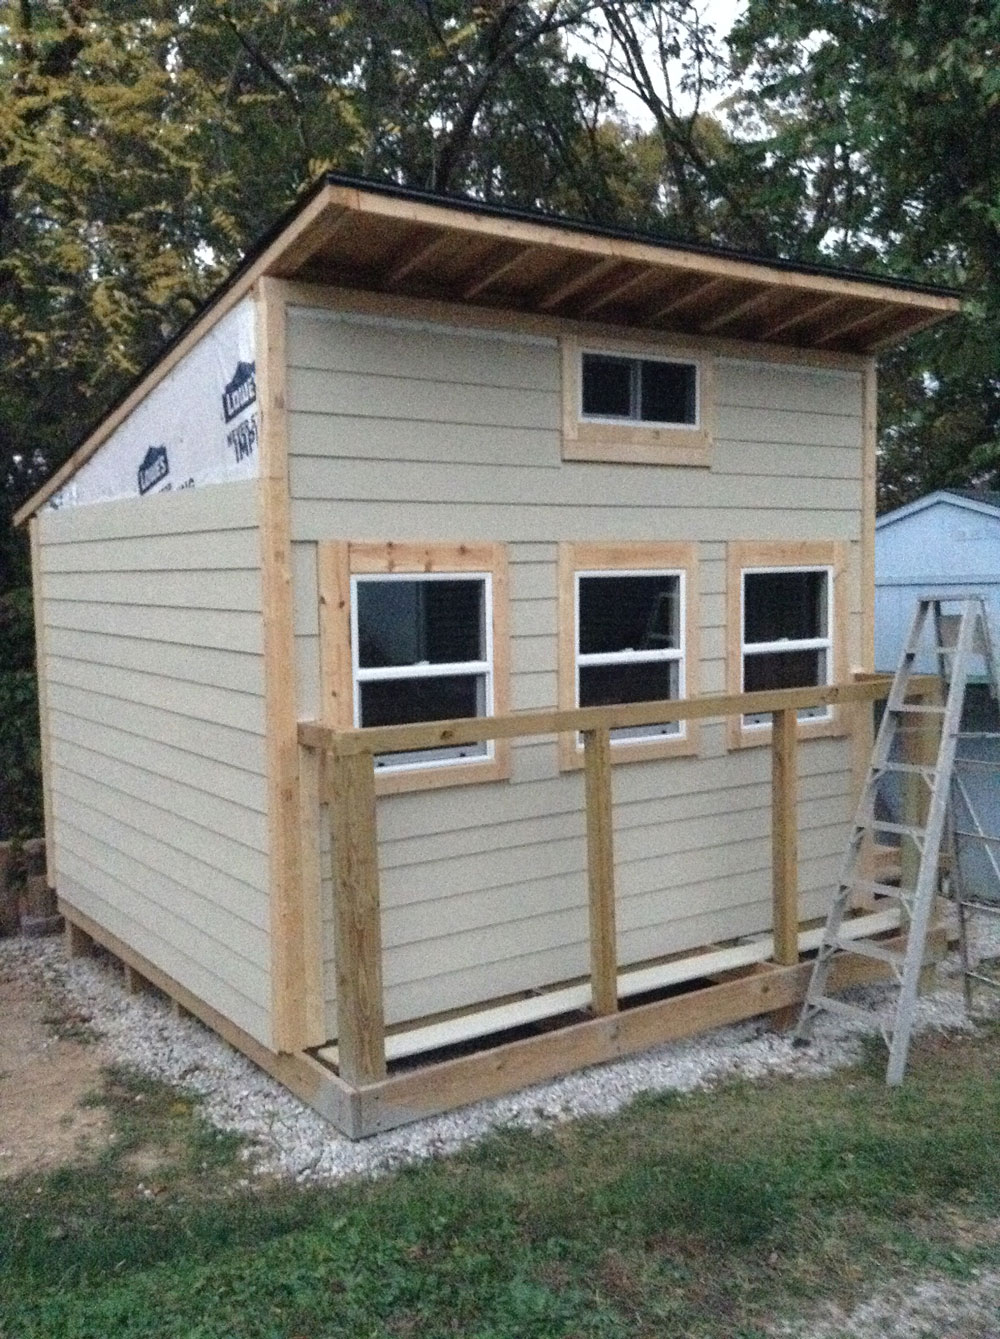
October 11. Installing siding on this wall was relatively easy. No openings. Just straight up. You should always start with the easiest task, right?

2016-10-11

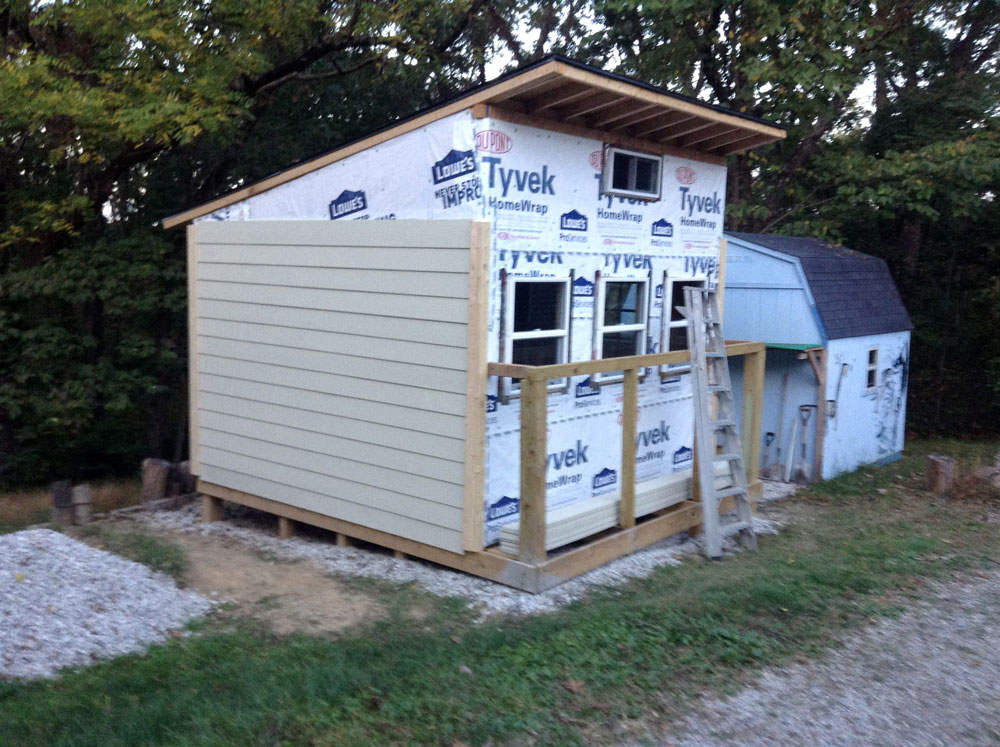
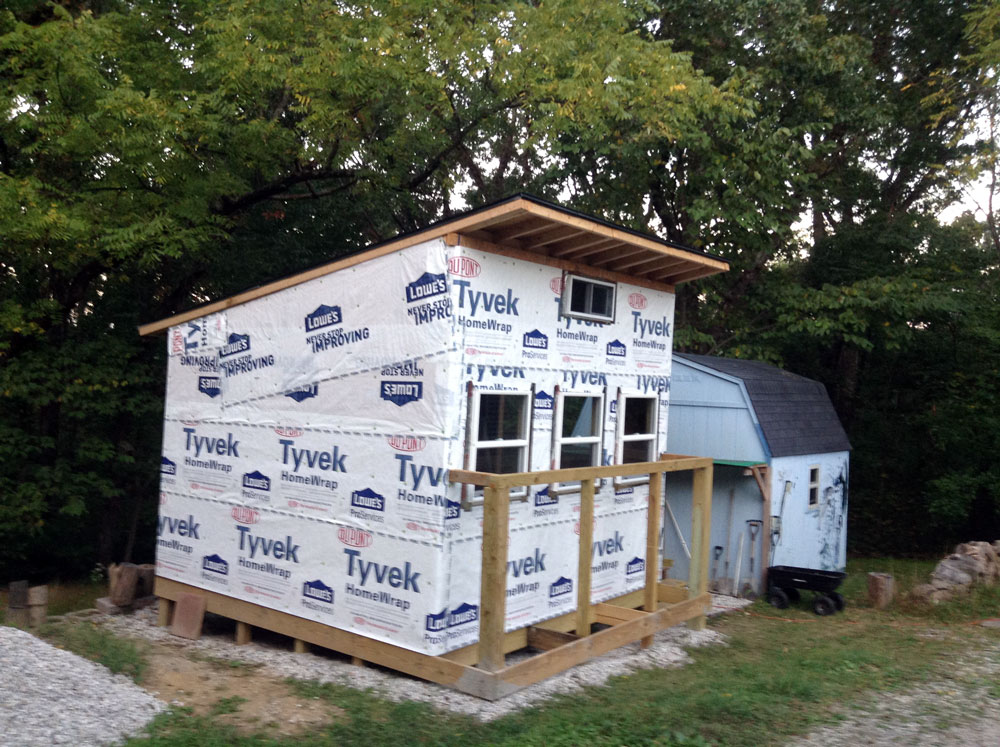
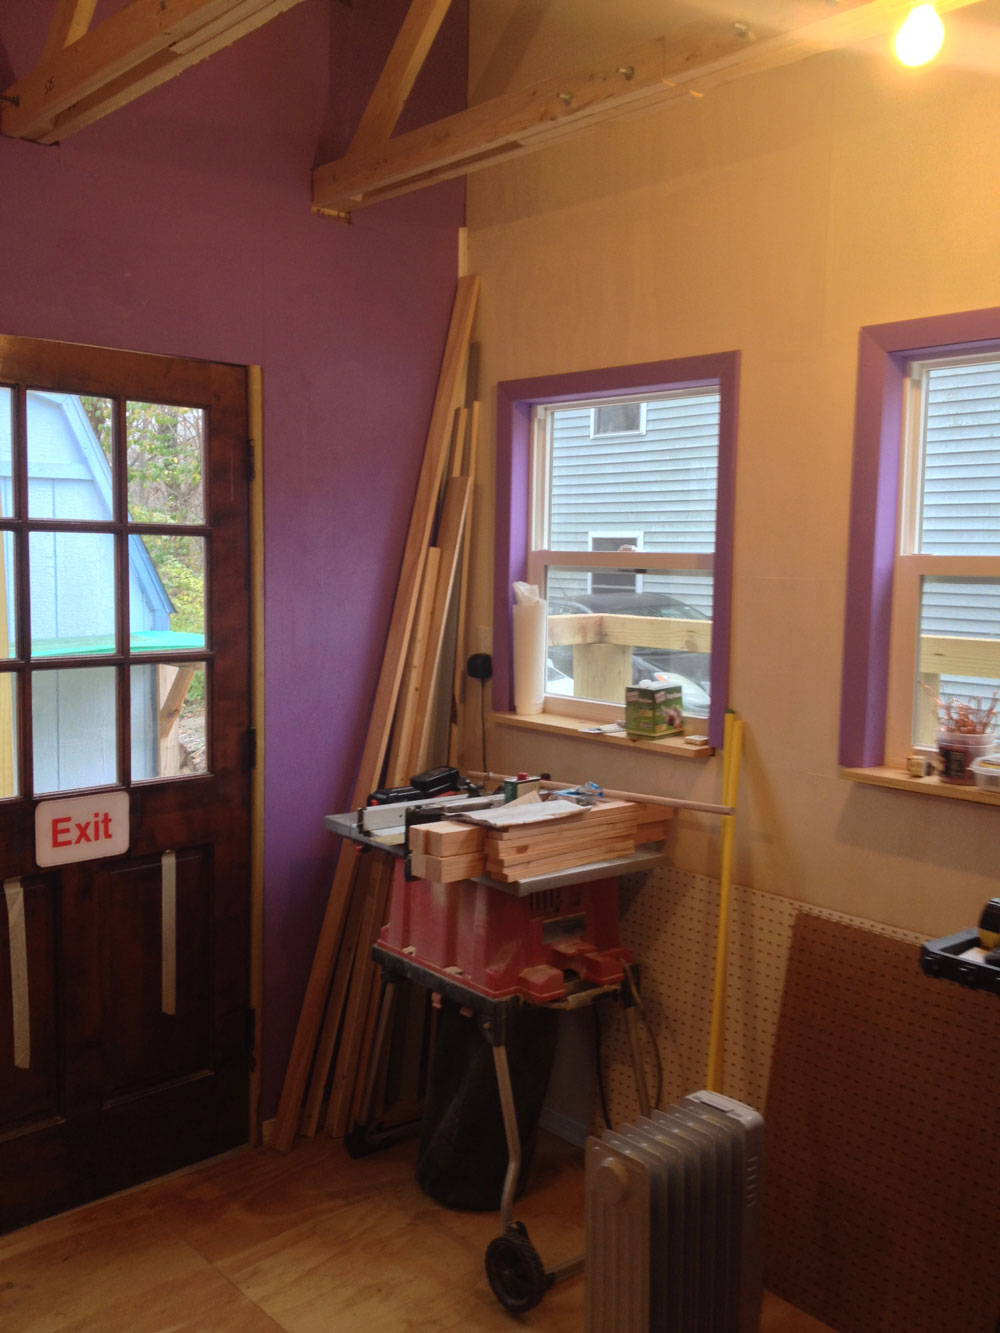
October 12. Cutting and installing these window frames on a good old miter saw was such a relaxing job in comparison.

2016-10-12

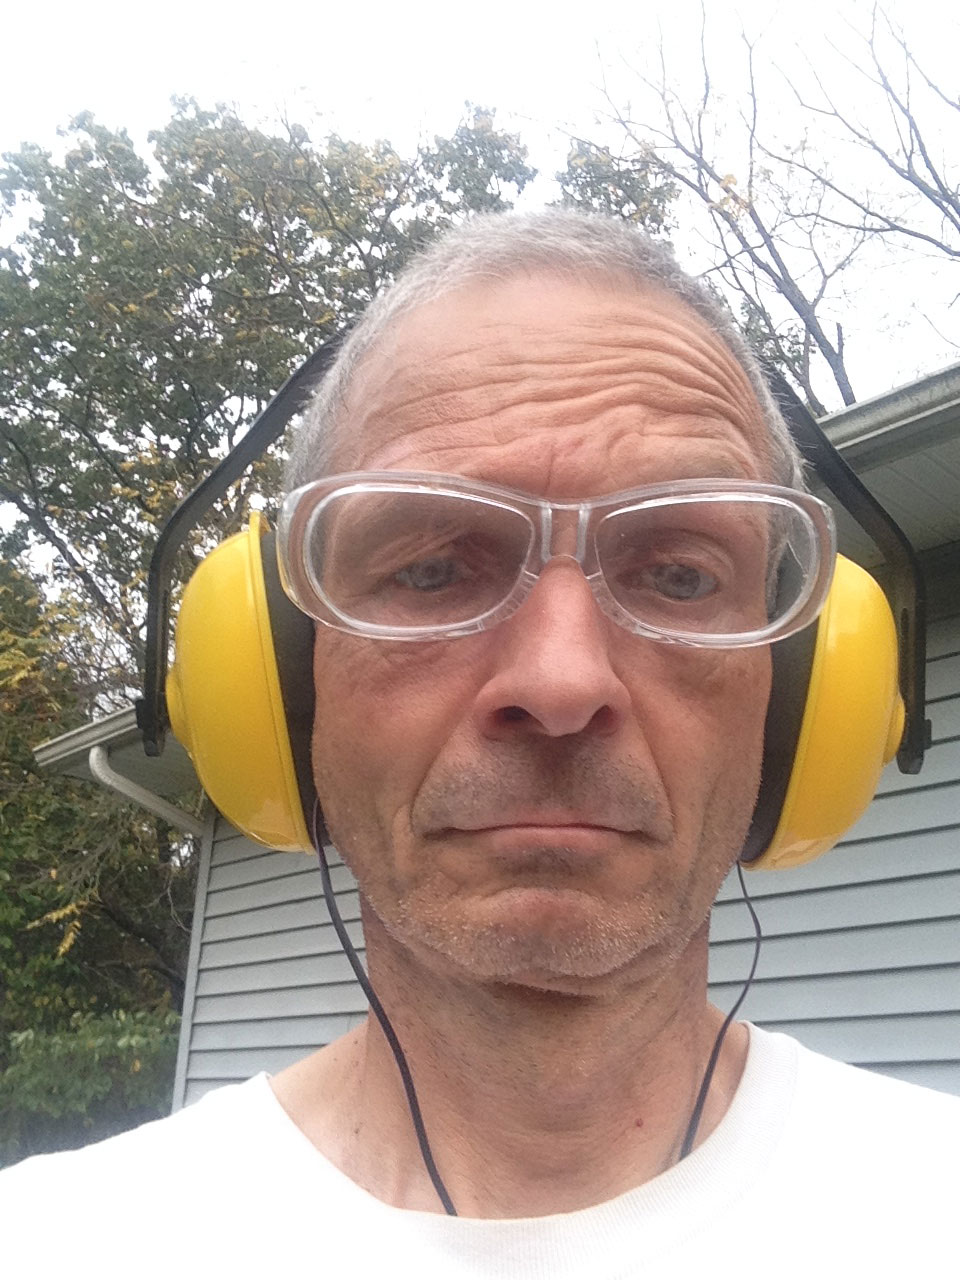
October 18. Monika was already on her Europe trip but I think the kids wouldn’t have been surprised to see me walking around in the house like that.

2016-10-18-a

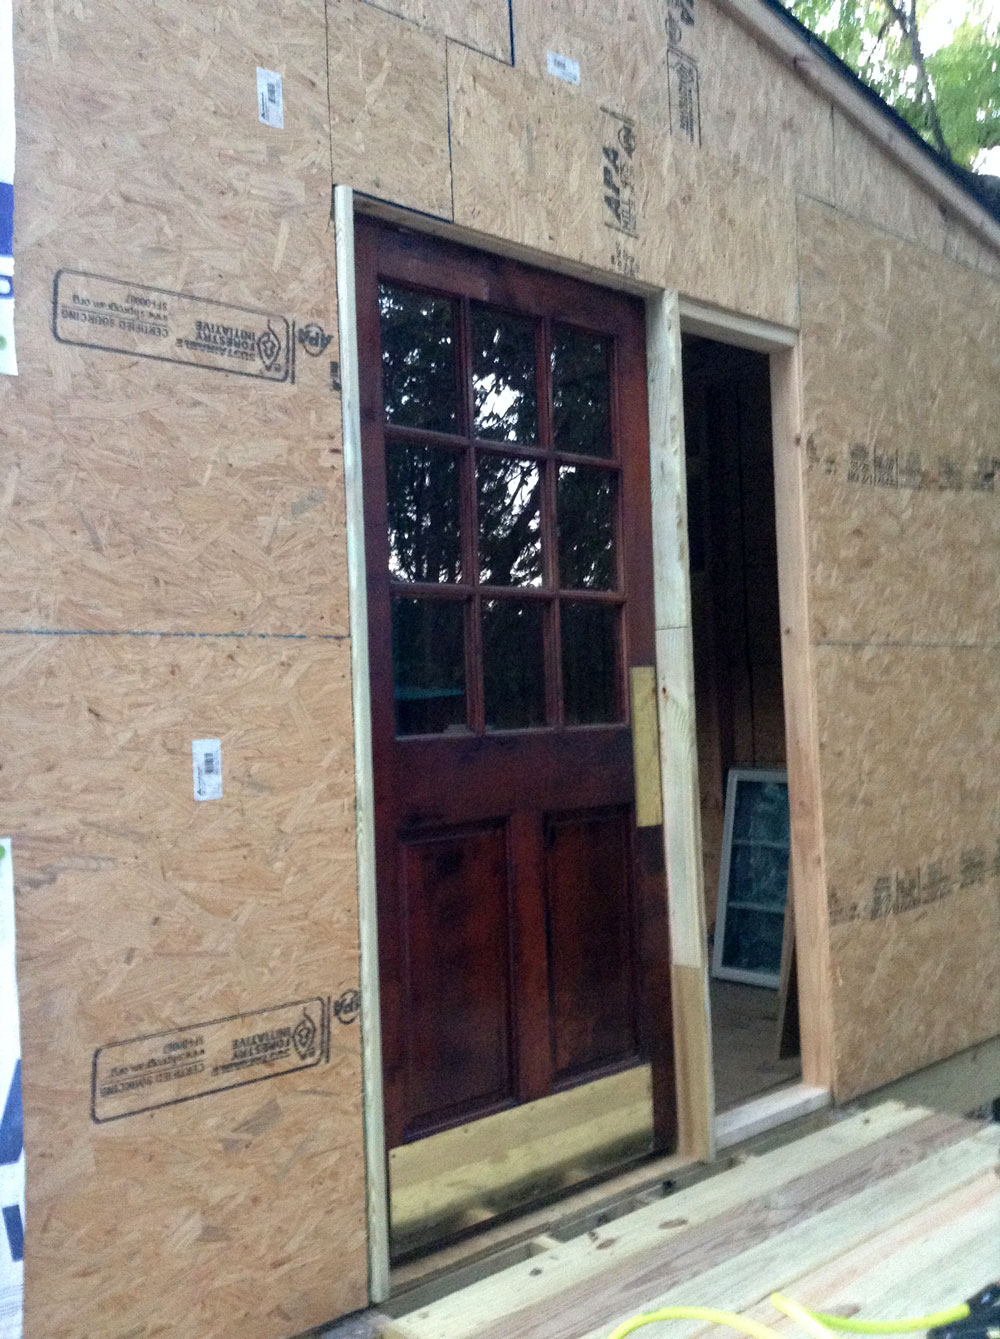
Of course there is always something that doesn’t quite line up. That’s when you improvise.

2016-10-18-b

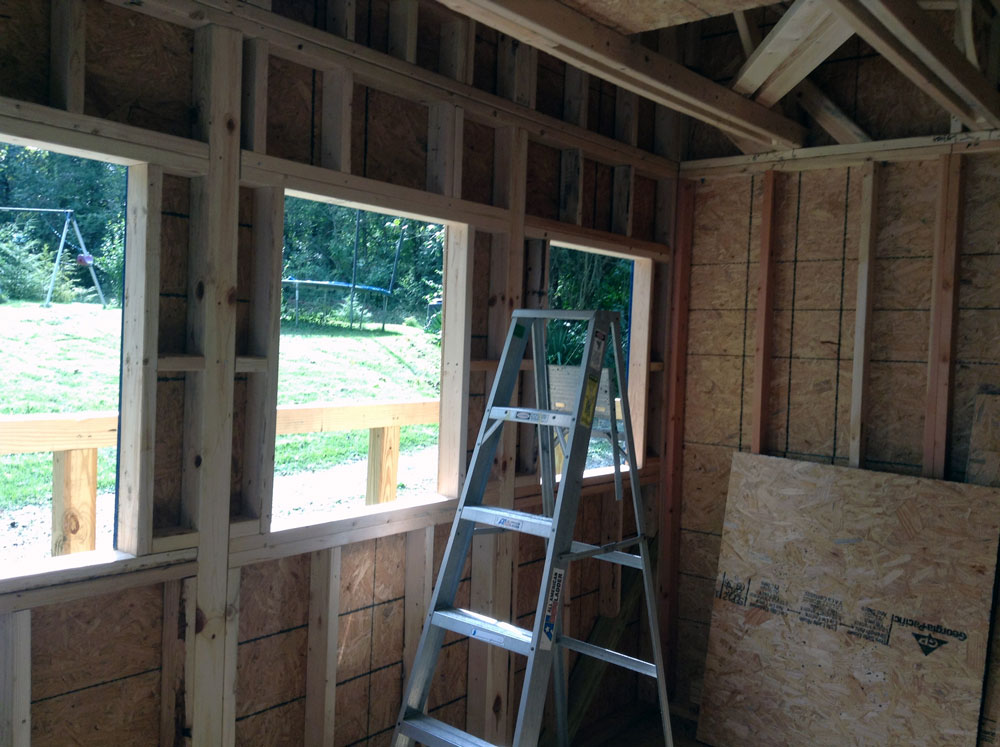
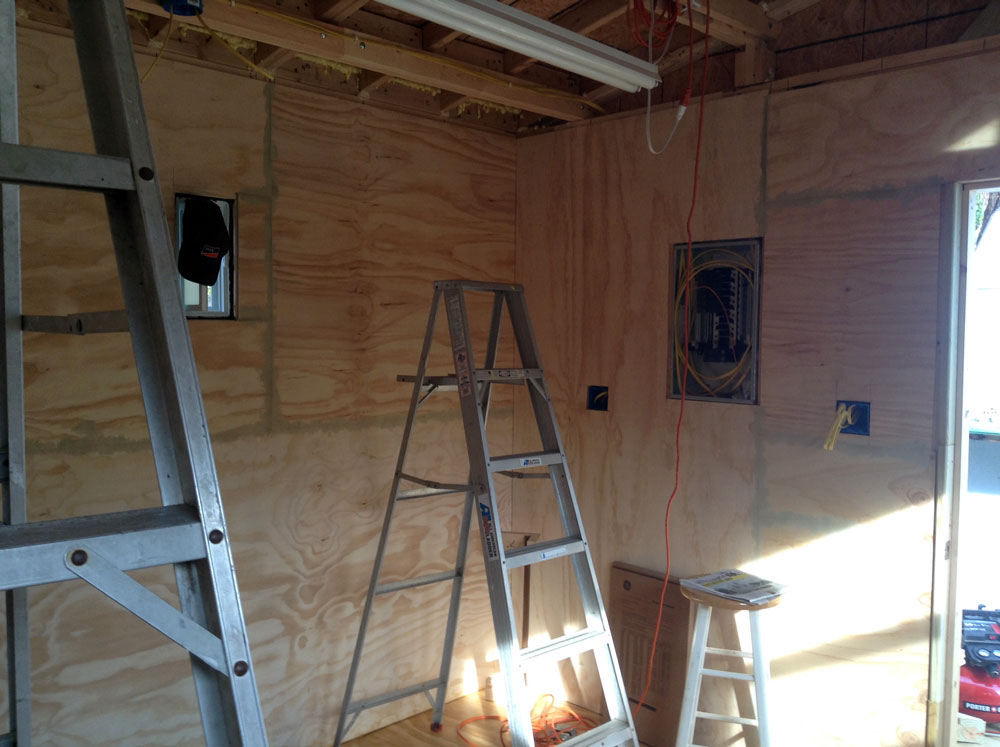
October 29. Most of the extra crucial exterior stuff was done and I started adding insulation and interior panels. I thought about using drywall but considering that I would attach countless racks, holders, shelves and other stuff to the walls plywood panels seemed a better choice.

2016-10-29-a

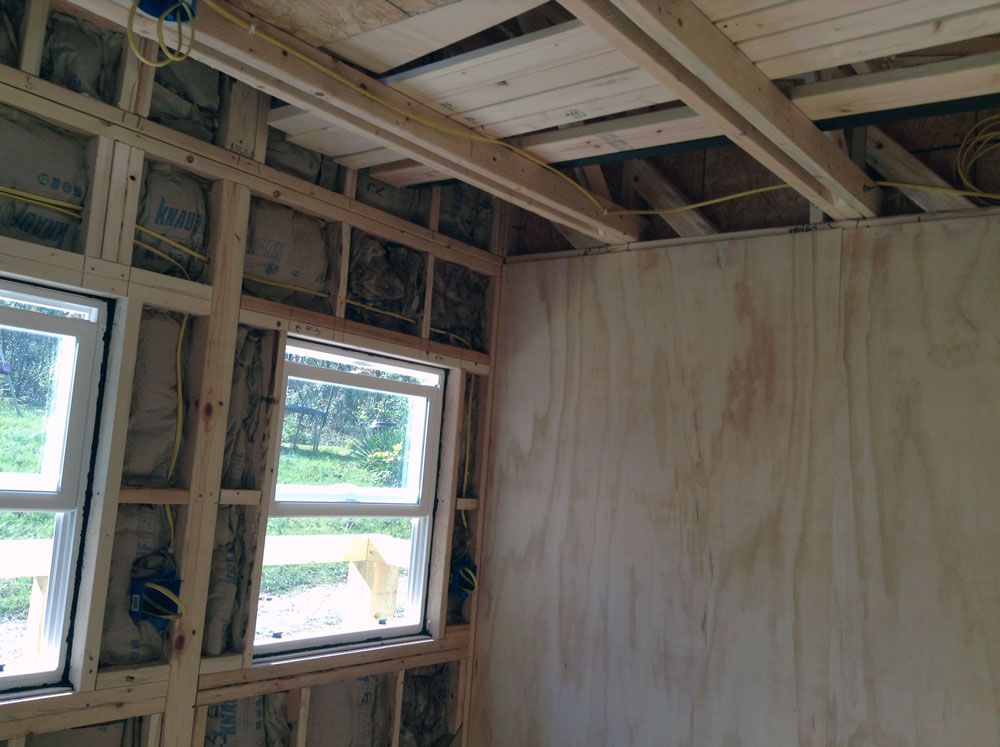
Wes and his assistant, my electricians from Atomic Electric, had already laid cable and installed boxes for the outlets, light fixtures and switchbox. In the picture below you can see my desperate attempt to fill some gaps with insulating foam. I guess this is easier when used with a sprayer machine of some sort but doing it through the flimsy plastic applicator that comes with the can is an insult.

2016-10-29

October 31. The final wall was paneled on Halloween. I used wood filler in the gaps. Hoping that Atomic Electric would soon have a day to connect the power so I could stop using that long extension cord.

2016-10-31-a

November 4. As long as I had been putting off starting this project, late Summer and Fall 2016 proved to be the right time. Probably due to global warming (I regret to say) there was an abundance of warm, dry days. Rarely did I get a break due to the weather.

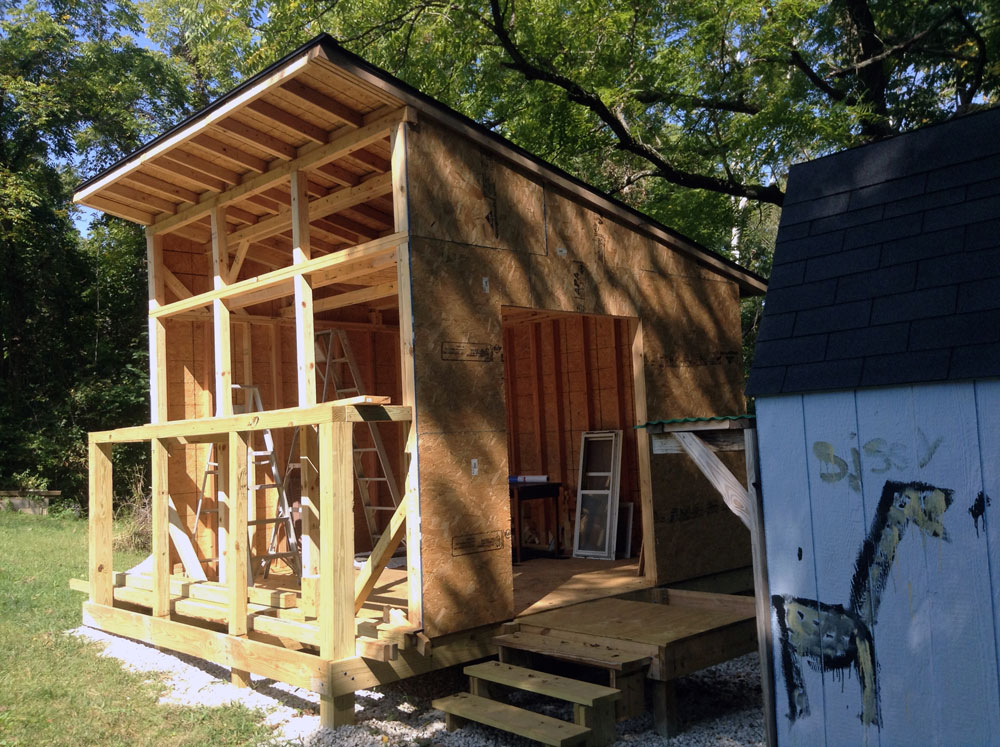
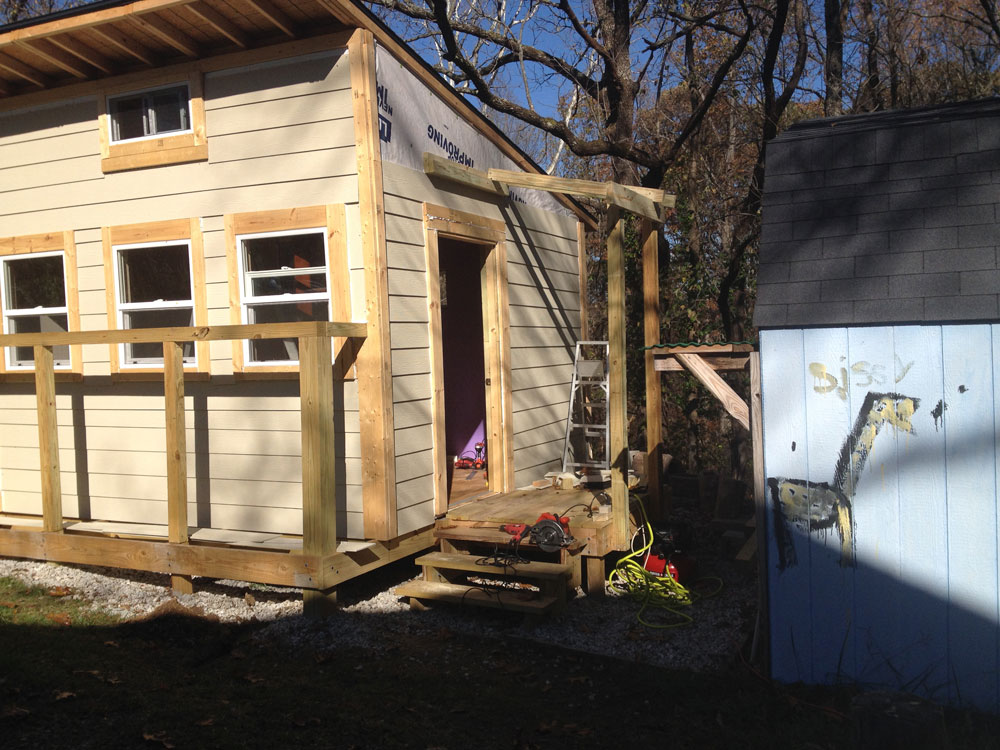
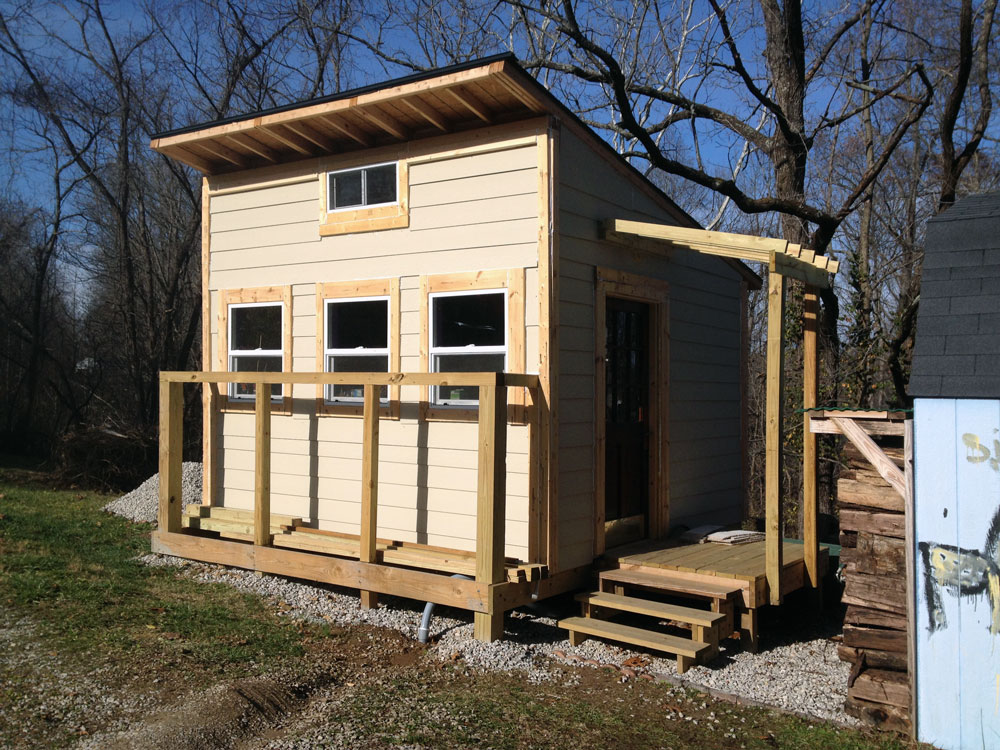
I didn’t originally intend to build a little roof over the entrance but I thought it would be easier to add the bracing now rather than later have to break through the siding.

2016-11-04-a

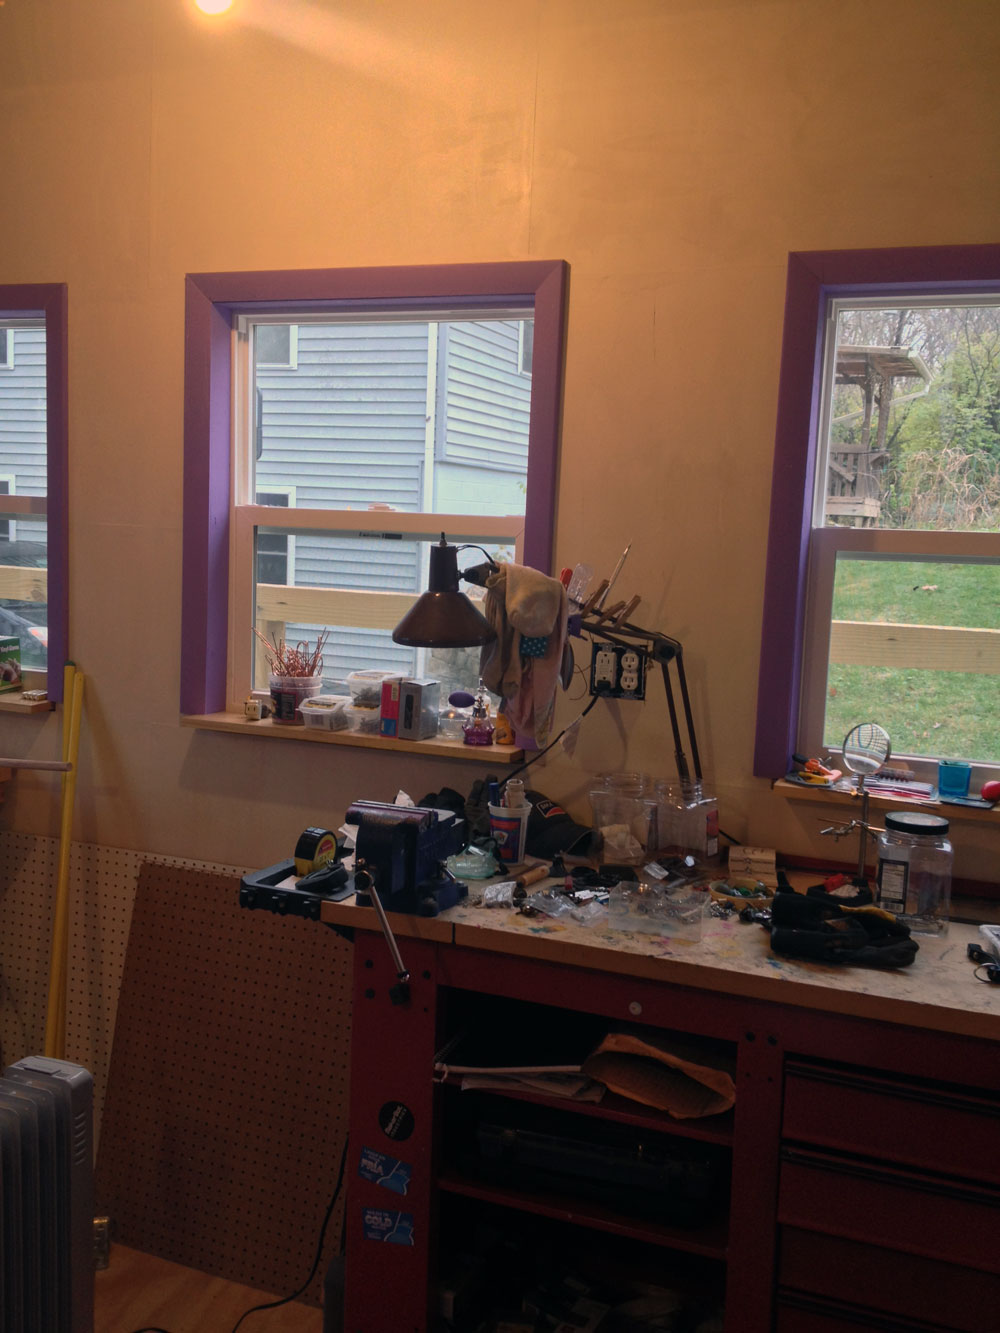
At this point all the interior wall paneling was installed and painted. I found out that our local recycling center takes buckets of unused paint that you can pick up for free. Well, they had one white and one purple bucket. It was free. And it’s a nice color combo. I also added some cheap trim to the corners and the base of the walls. Just looks cleaner.

2016-11-04-b

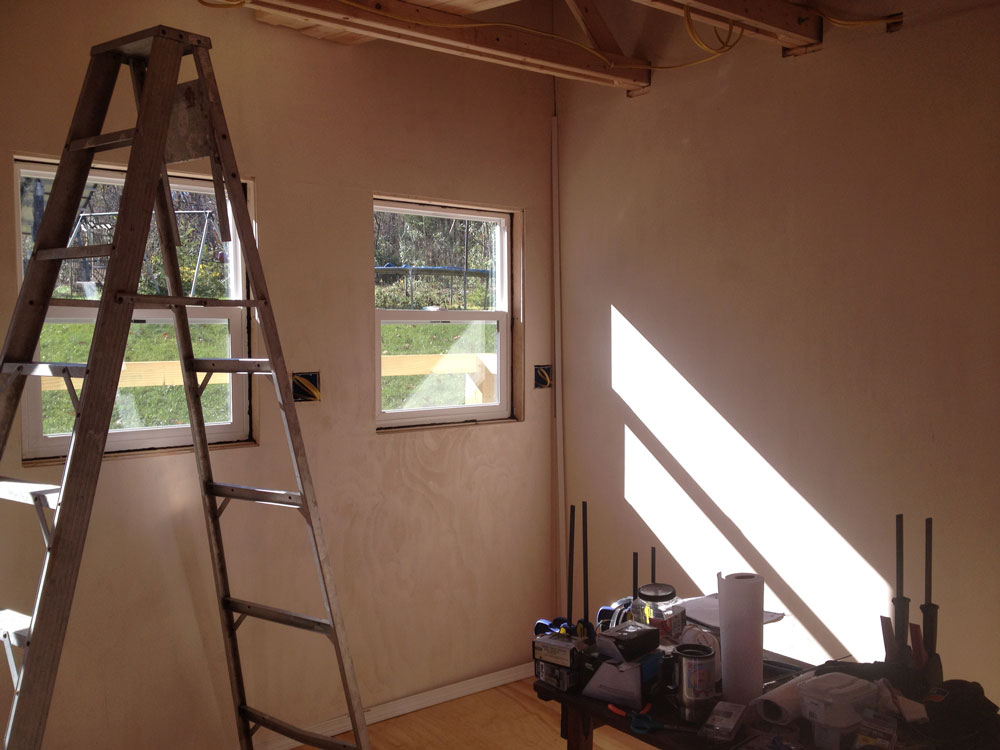
How can you not like the purple?

2016-11-04-c

November 10. Major milestone. Two days earlier Atomic Electric finally had a day to swing by for the final electrical installation. This workshop is geographically at a nice sunny spot on our property but also exactly on the opposite side from where the power lines connect to the house. At first I was afraid I would have to dig a trench for the cable all around the house. But there is so much growing, especially some larger trees with big roots. It would have been a nightmare. So we decided to run the cable in a pipe along the underside of the deck in the back of the house, then along the side wall and finally through a relatively short 20’ trench under the driveway. Trenching under the driveway was hard enough. Very rocky and well compacted soil. My whole body was aching, but especially my hands. I tried to play a little guitar that evening but had no fine motor control left in my fingers.

Then Zack helped me move the workbench from the basement to the workshop. It wasn’t long now. Not October, not November, but it would be done before Christmas.

2016-11-10-a

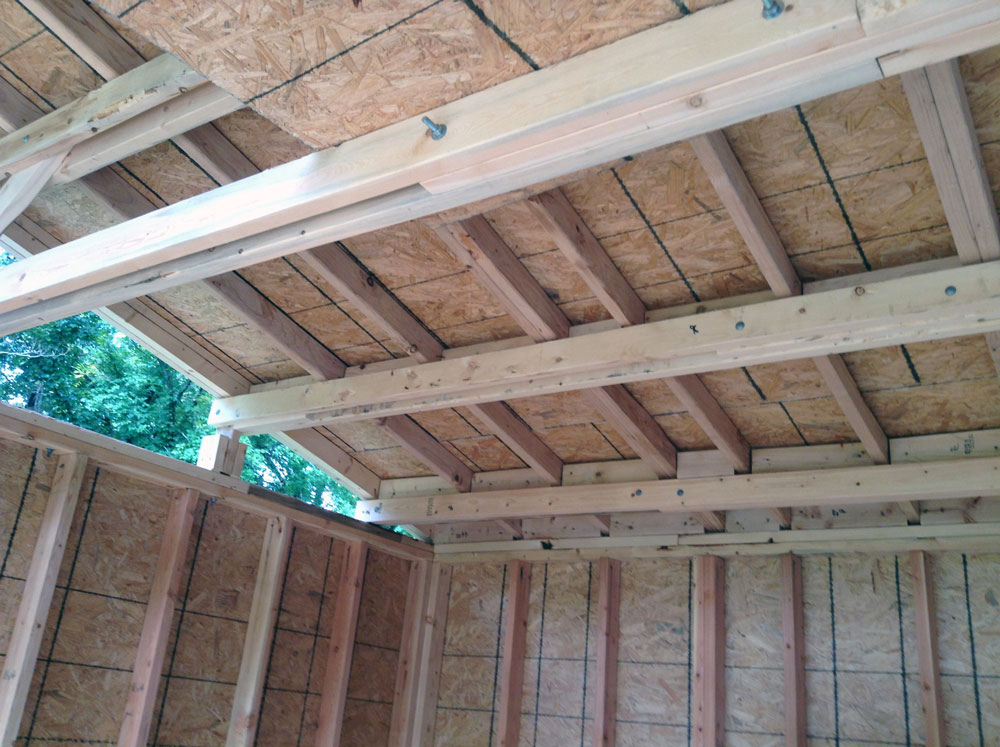
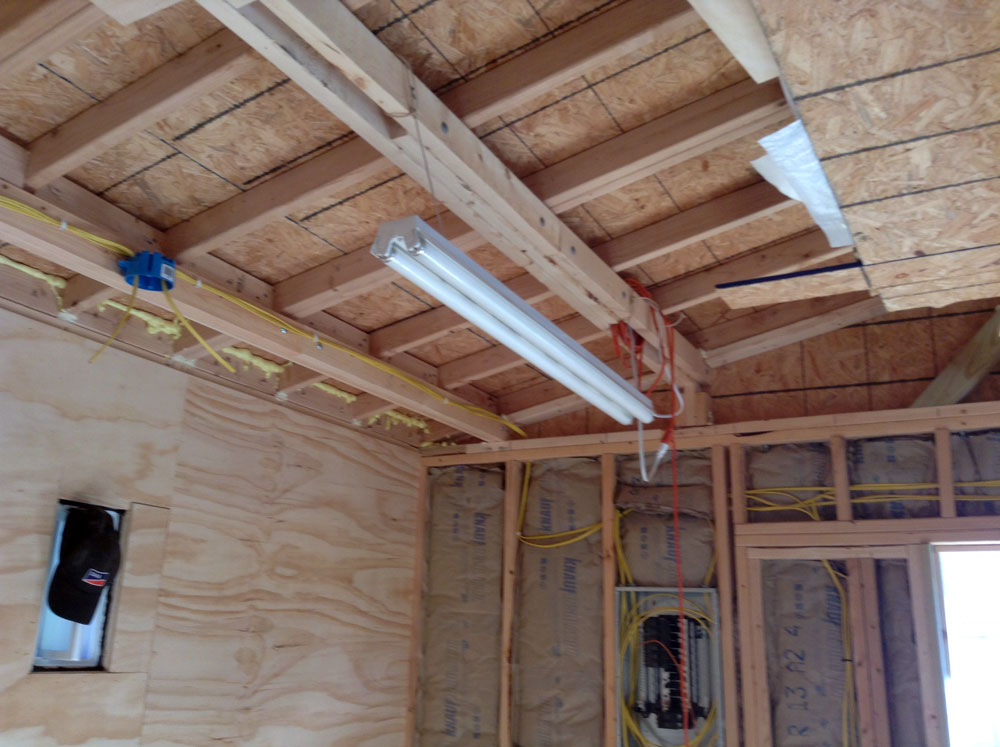
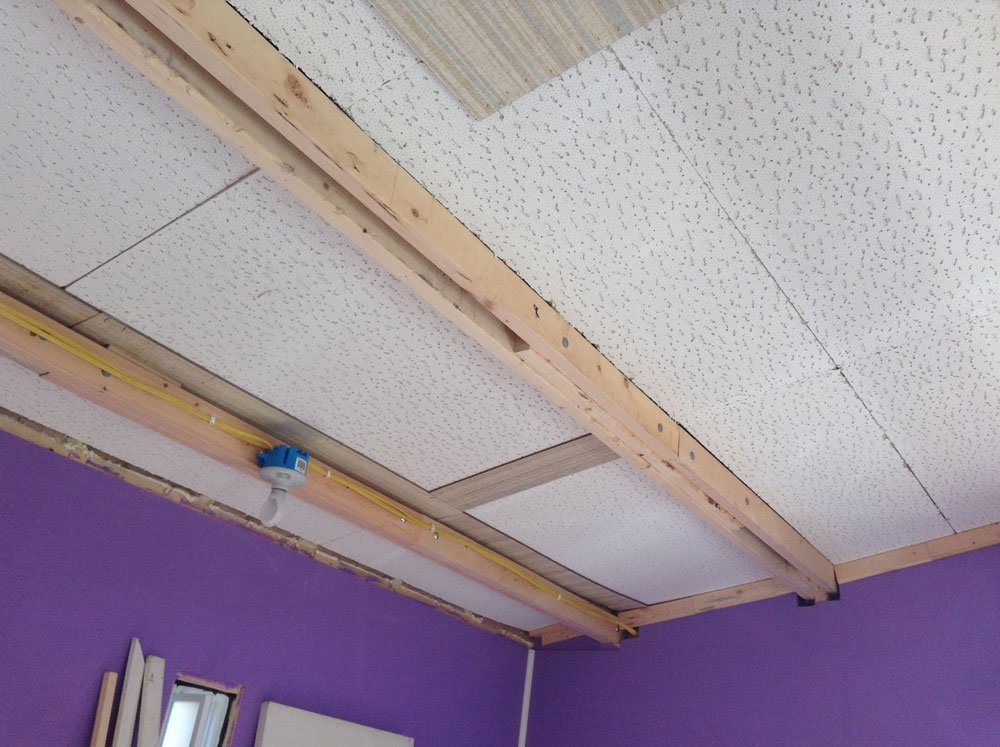
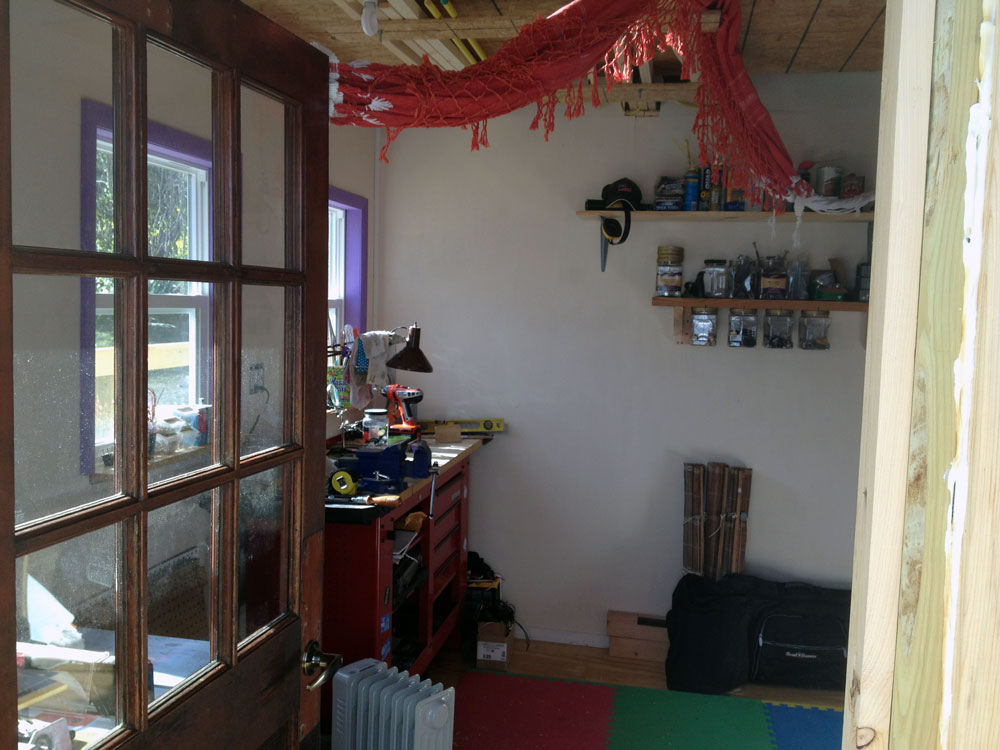
November 15. One of the last things before a full move-in was insulation in the ceiling. There had been a few colder days and the little radiant oil heater I had to keep the place warm worked fine but you could tell that a lot of heat was escaping through the ceiling. So insulation it was and since you can’t leave that exposed I needed some sort of ceiling. More improvisation ensued. But who ever looks up?

2016-11-15-a

November 24. By Thanksgiving break I had most of the bigger machines and tools in the workshop. Including the CNC rig. I wanted the basement to look nice and clean for Monika’s return from Europe. While the mechanical part of the CNC setup worked I had just updated the Dell PC I use to control the CNC machine, which has the hot name Fireball, to a newer and different flavor of Linux. The Fireball control interface needs a computer with a parallel port and these old Dells still have them (I have two of the same type, with Linux they are quite usable.) Since the workshop is in clear line-of-sight of my office there is great Wifi reception out there but after the upgrade to Debian Wheezy neither of the Dells wanted to use Wifi. Another few afternoons of research and reinstalling. As so often the cause was obvious once I figured it out. As much as I love Linux but troubleshooting it sucks.
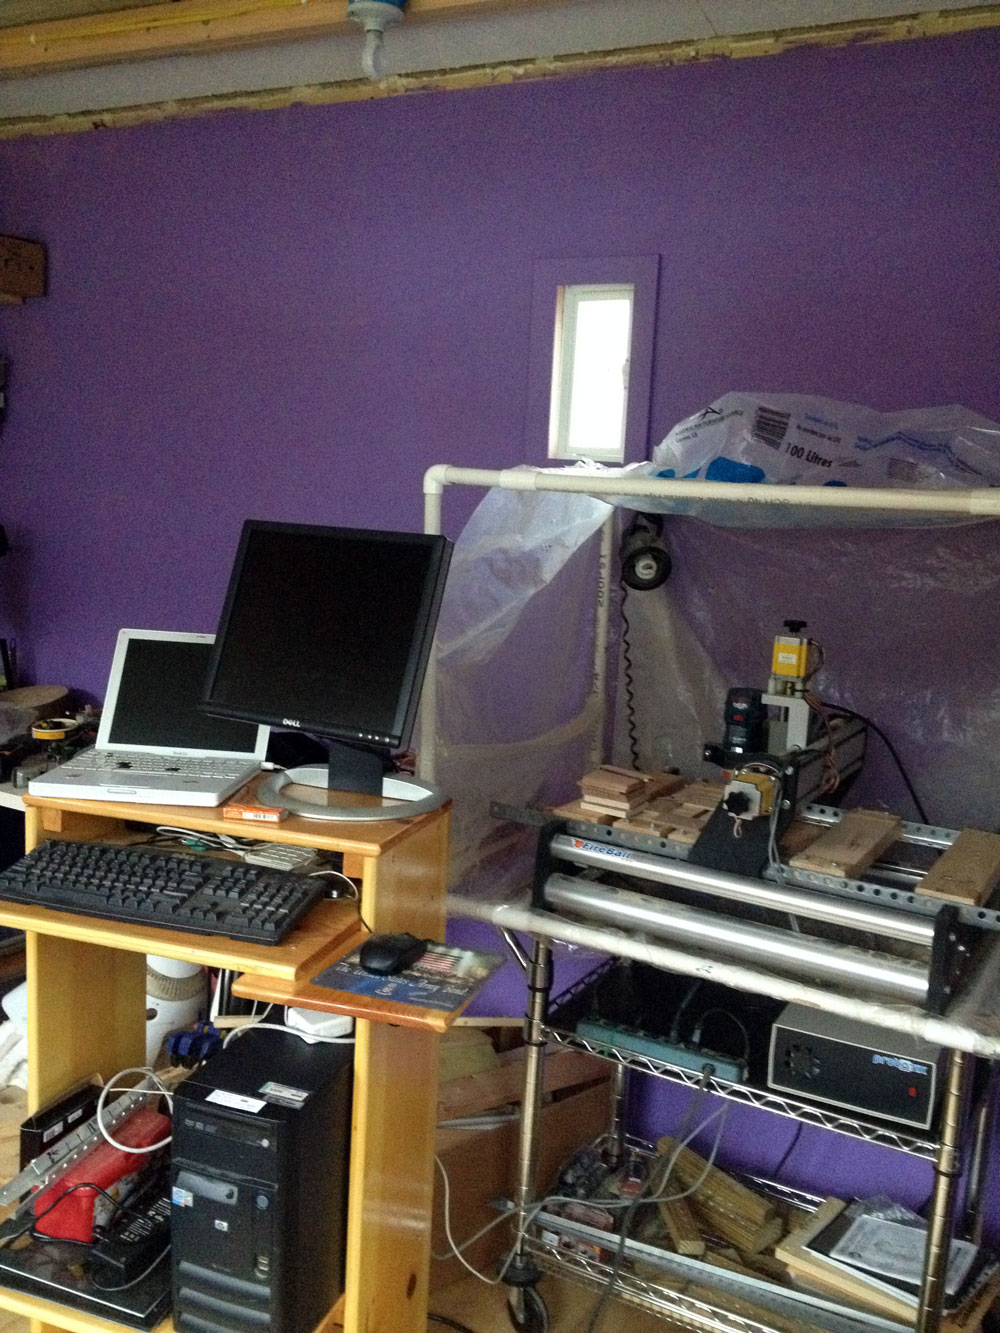
2016-11-24-a

It looks nice now….

2016-11-24-b

I still have to build and install lots of storage for tools, materials and all the stuff. The top of the workbench should really be free of all that crap. But for now it feels like home.

2016-11-24-c

November 28. While there is still some stuff to cover on the outside, painting the outside, maybe installing that little roof over the door…. But this day Fringelab is officially done and ready for full usage.

2016-11-28-a

What looks like playful decoration, the red thing under the ceiling is a hammock. Tried to nap in it but it’s a bit uncomfortable.

2016-11-28-b

November 29. And here is the simple firewood rack I started building earlier in the year, finally finished. The circle closes. The project is done, what do I do next?

2016-11-29


Building of Fringelab, part 2

Written by peterkienle on

Back from trip to Germany and Scotland on August 1. After measuring, I noticed that most of my posts had been seriously knocked out of alignment during the cement pour in July. I cut all of them off, except the front two 6×6” posts. Revised my plans and decided to go with a 12×12’ floor and use the front with the posts for something else.

August 28. In the past weeks I spread three tons of #3 crushed stone, built the stairs and we are now ready for the floor panels.

2016-8-25-a


Finally started framing after mounting the 3/4” plywood floor panels on a revised foundation frame. To get the considerable load of heavy lumber and panels from the store to my construction site I borrowed Dave Weber’s red truck a second time. I am not an expert in any of this stuff – apparently especially not in loading studs of various lengths, 4×8’ plywood panels, and 4×4″ posts. On the way from the store, in a shallow curve on the ramp from W 3rd St onto SR37, the whole load decided to slip off the truck. Luckily, it was Sunday afternoon and hardly any traffic. Like in a movie. I felt the load shift and then saw in the rear view mirror how $300 worth of lumber literally fell by the wayside – all in slow motion. Immediately another driver stopped and started diverting traffic. Another guy jumped out of his car and started helping me collecting the dozens of pieces of lumber. Only minutes later a police car arrived and put the lights on. I thought I was going to jail. But the officer made sure other drivers were aware of the situation until everything was loaded back on. Then I found a pair of super heavy duty cargo ratchet straps (or whatever they’re called) behind the seat. The rest of the 12 minute drive went smoothly. Unloading everything did me in for the day.

While mounting the floor panels I hit my left index finger with the hammer. That was the only injury from the whole project. The finger nail turned black and has only recently fully regrown, outlining the timeline of the project.

September 5. The rear wall was the easiest to frame. In all of this I can’t emphasize enough that clamps are super important to hold stuff. Also, Dave had borrowed me his pneumatic nail gun. What a time saver.

2016-9-5-a

2016-9-5


Sepember 6. Wall framing is going smoothly.  No wonder, I had the plans and measurements all worked out. I thought I would be done by October….

2016-9-6

framing


September 12. It was really coming along and felt already pretty stable with the OSB side panels up. At that point I didn’t know yet what was going to happen with the front wall. I thought I might pick up some random used windows and do something creative. Also at that time I realized that the way I had intended to frame the roof was not going to be strong enough. Originally I had 16’ 2×4”’s with no support in the middle. This is where the improvisation started.

2016-9-12


September 15. After two days of building three major cross supports for the roof I realized that there would be a little attic. To come in handy for lumber storage. Also, strong enough to hang a hammock.

2016-9-15


September 18. Overall, one of the hardest things in the project was that I only had one pair of arms. While Zack helped me hold a few of the 4×8’ OSB side panels I just couldn’t wait every day until he was home from school. So, clamps again. A whole other adventure were the roof panels. Somehow I had to get four full size and four half size OSB panels on the roof before the next rain (the exposed plywood floorboards started to dislike the little rain we got). 4×8’ OSB panels are not only heavy but also not exactly easy for a single person to carry. Apart from starting the project in the first place figuring out a way to get the panels 12 feet up on the roof was probably the most challenging. I wish I had taken a picture. Where you see the ladder in the picture below, I built a guide at the roof edge using a short 2×4″ and a clamp (see, again). Now I could lean the panel that was going on the roof against the side of the structure and slowly push it up, while climbing the ladder. The critical point was when the center of the panel was balancing on the edge of the roof. One step higher on the ladder, one more push so that the panel was more than half up. Then let go and it would flip up while the guide piece prevented it from sliding down the back. Kinda a dangerous and painful but it worked.

Once I had two panels up I climbed up to nail them down so I had something to sit on. Then I “transported” the rest of the panels up and was so proud of myself. I was going to beat the rain after all. I moved the ladder inside the structure and put all the tools on the roof. Now, when you use a nail gun you want to wear ear muffs to protect your hearing. Also, some safety goggles are good. So my visual and aural senses were well shielded from the outside world as I was nail-gunning away on the roof. It had been cloudy and muggy all day. I was sweat drenched and didn’t realize that a very light rain had set in – until  a lightning bolt came down really close (the thunder was almost instantaneous).  I was one half panel away from finishing but realized that I had to leave it at that. Luckily, I had a few of my clamps (see, again) up on the roof and was able to clamp the loose panel so it wouldn’t fly off in the storm. There was now one 4×4’ opening in the roof – but the ladder was at another spot, not where I needed it. This was when I would have screamed for help but nobody was home. I had to somehow get off the roof. Eventually, I managed to climb into the rafters and under the roof to the front where I could let myself down. Felt like a monkey.

2016-9-18-a


Some of the improvised roof supports.

2016-9-18


September 23. Finally, it was save to start storing some of the tools and materials under the new roof. Before, I spent every day half an hour in the morning, schlepping air compressor, nailer, miter saw, table saw, etc. From the basement to the construction site. And the same in reverse in the evening.

2016-9-23


September 27. As I mentioned earlier, I was going to think about that front wall and windows when it was the right time (improvising again). Well, the right time came and I picked up three really nice looking windows plus a cool, large door at the Repo Store in Bloomington. Luckily, it was 50% off sale and with other rebates everything was less than $20. It turned out that the windows were unusable because they required a specific frame that nobody knew where to get from. I picked up three plain vanilla windows that were on sale from the hardware store. Then I started adding some (improvised) framing to the front wall. By the time I had put the panels in I needed a lot more studs – the panels need to be attached to something.

2016-9-27


September 29. At last. Fully enclosed (sort of) and a panel blocking the entrance opening so that the cat can’t go in to poop.

2016-9-29-a

2016-9-29


October 2. I had thought that I might be done by early October. But there were so many little and big things to do, still. Since I wanted this structure to be reasonably dry, heatable and comfy (after all, computers and all sorts of electronics are supposed to be in there, not to mention a hammock for the occasional break) I decided to use house wrap. Sounds easy. But again, a single person has to be very creative to find ways to hold these large, slippery sheets in place while putting the fasteners in.

2016-10-2


October 5. By the time I started installing the windows the usefulness of that strange front bracing had itself proven again and again. Strong enough to stand on, lay on heavy boards as scaffolding, and accommodate eventual visitors on camels or giraffes.

2016-10-5-a


I had planned on a wider door because I was concerned that my CNC machine wouldn’t fit through. After some measuring I was convinced that this 30” door from the Repo Store would be fine. Actually hanging the door and making it fit was a bit nerve wrecking.

2016-10-5-b


Adding some extra framing and panels to fill the gap by the door finally gave me a fully enclosed space. Another landmark. I thought I would be done within a week or two.

Continued in part 3.

Building of Fringelab, part 1

Written by peterkienle on

It all started with Dave Weber’s drill press.

After last Winter (2016), I thought I should build a little rack to stack the firewood in our crowded basement. This was from a neat plan in Popular Mechanics magazine. Among other things it required some easy metal working. When I asked my friend Dave what drill bits would best drill through metal he said: “Here, I have this old drill press. Do you want it?” After taking the big, heavy hunk of tool home I realized that it would have to be taken apart, cleaned, oiled and then some. Over the course of a few mild days in March I carried the machine, in various stages of disassembly, outside to do the thing and then back in before it turned too wet or dark. After it was all put together it looked (almost) like new and worked – but where was I going to put it? The large basement room, which was supposed to be a rehearsal and ping-pong facility, was already full of saws, computers, a CNC machine and wood scraps of varying sizes….

This is the point in time when I knew I needed an external workshop where I could paint, and make a mess and noise year round.

Not that it was such an original idea. A few years earlier I had toyed with the idea and even staked out a small plot next to the garden shed. But that project then fell by the wayside because it looked for a time that we might actually move and sell our house. But the stakes and the marker lines where still there – I mowed around them every time I cut the grass.

2016-5-29

Like with every project of that size I dreaded getting started. Like the kitchen remodel from 2012, once you start you have to finish. And this one would be seen by every one of our neighbors. Nevertheless, in late May 2016 I broke ground. The first holes on June 30, 2016….

2016-6-30

2016 turned out to be a dry Summer and work progressed quickly. My wife Monika left for a longer stay in Europe in early June while younger daughter Jasmin and I were to follow for a two week stay on July 16. The plan was to have the foundation done and concrete poured before the trip and finish after in August.

July 1 saw me setting and aligning posts. At that time I hadn’t really planned the rest of the structure. Rather I thought I was roughly going to follow a plan from an issue of MAKE:, which called for a 12×16 foundation. My maximum size was 12×14 feet and I hoped to adapt their plan.

2016-7-1

July 5. If I could travel back in time I would tell myself that these holes really should be better aligned. Boards and panels are 4×8’ for a reason and your foundation should take that into account.

2016-7-5

July 7. Looks good so far.

2016-7-7


July 12, the evening before the cement delivery, I realize that I also need some sort of stairs. Extra digging ensues.

2016-7-12

July 13, morning. One last picture before cement truck covers everything.

2016-7-13-a

July 13, afternoon. Why would I use long 6×6” and 4×4” posts that would make it nearly impossible for the cement truck operator to navigate the chute through – in the process throwing off my careful alignment? I had finally decided to not go with the MAKE: plans. They were using some sort of arch/girder system to make sides and roof. It would have required 11 of these pieces in my structure. Each piece comprised of four large OSB side pieces cut from a 4×8′ panel by a huge CNC machine (or a hand saw?) This would have been 44 large, complicated pieces, cut by hand. Glad I abandoned that idea. I was going to go with a more normal framed structure. But I wanted to incorporate the foundation posts, at least the 6×6″ corners. And now they were knocked out of alignment.

2016-7-13-c

July 13, evening. Our little puppy Joy looks at the mess (construction site and constructeur).  That day, with the frantic last minute hole-digging and 90 minute non-stop concrete pour did me in. I haven’t been drinking much alcohol since a few years, but I thought I would drink a cold one that evening – and promptly passed out on the couch.

2016-7-13-d

Two days later off to Germany. We’ll deal with the kinks when we come back.

To be continued in Fringelab, part 2……..

Copyright © by Peter Kienle