Building of Fringelab, part 2
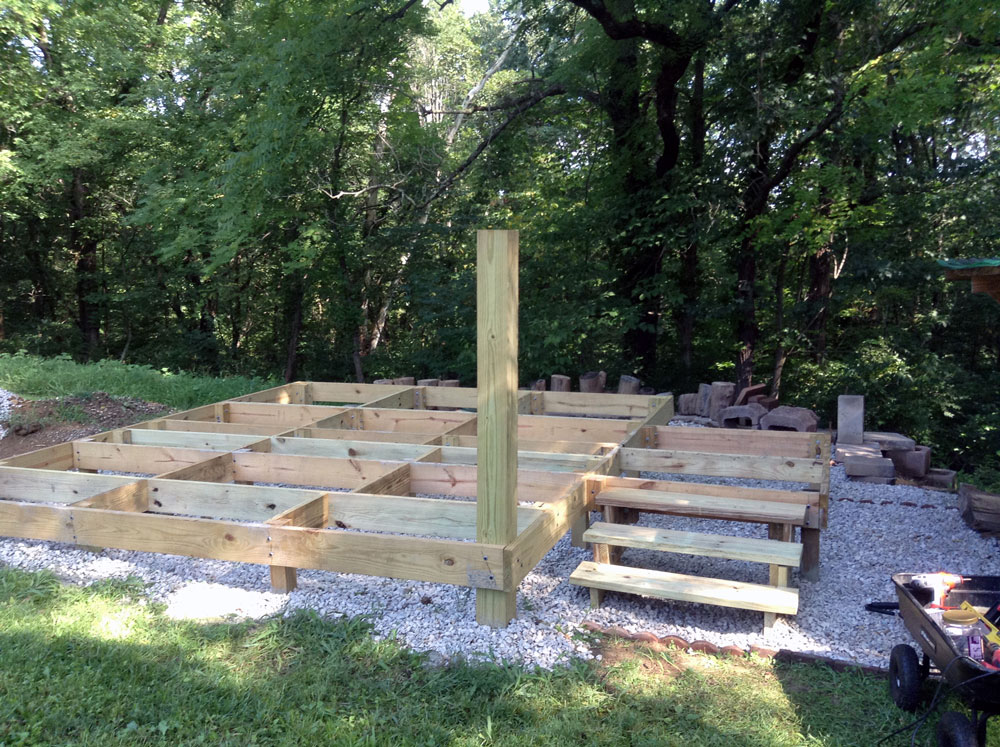
Back from trip to Germany and Scotland on August 1. After measuring, I noticed that most of my posts had been seriously knocked out of alignment during the cement pour in July. I cut all of them off, except the front two 6×6” posts. Revised my plans and decided to go with a 12×12’ floor and use the front with the posts for something else.
August 28. In the past weeks I spread three tons of #3 crushed stone, built the stairs and we are now ready for the floor panels.
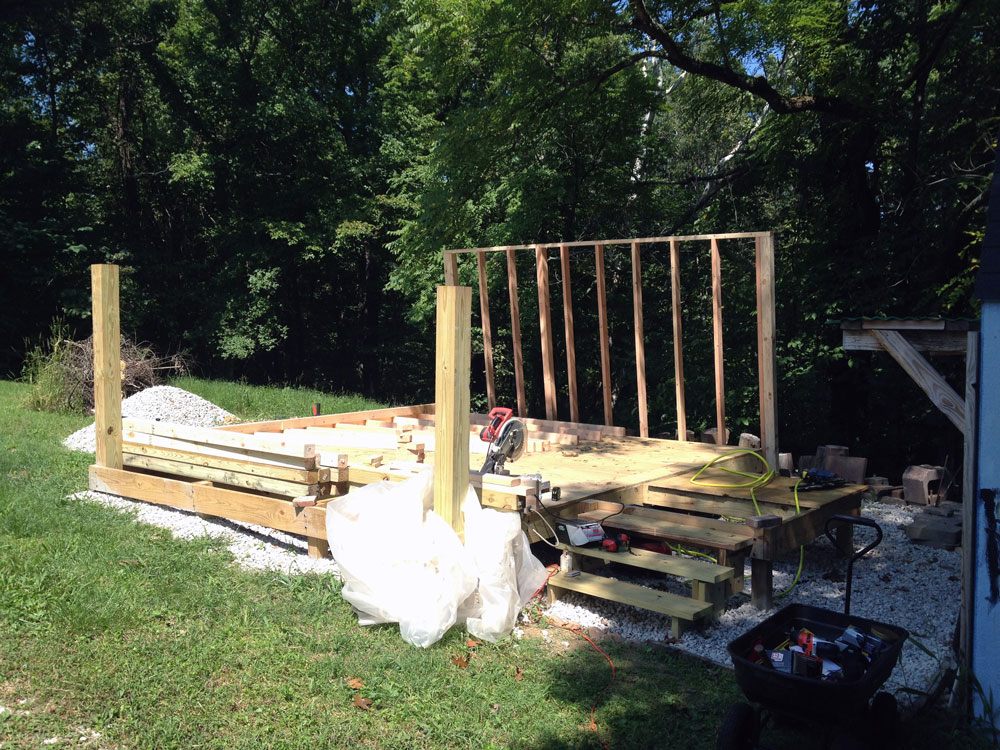
Finally started framing after mounting the 3/4” plywood floor panels on a revised foundation frame. To get the considerable load of heavy lumber and panels from the store to my construction site I borrowed Dave Weber’s red truck a second time. I am not an expert in any of this stuff – apparently especially not in loading studs of various lengths, 4×8’ plywood panels, and 4×4″ posts. On the way from the store, in a shallow curve on the ramp from W 3rd St onto SR37, the whole load decided to slip off the truck. Luckily, it was Sunday afternoon and hardly any traffic. Like in a movie. I felt the load shift and then saw in the rear view mirror how $300 worth of lumber literally fell by the wayside – all in slow motion. Immediately another driver stopped and started diverting traffic. Another guy jumped out of his car and started helping me collecting the dozens of pieces of lumber. Only minutes later a police car arrived and put the lights on. I thought I was going to jail. But the officer made sure other drivers were aware of the situation until everything was loaded back on. Then I found a pair of super heavy duty cargo ratchet straps (or whatever they’re called) behind the seat. The rest of the 12 minute drive went smoothly. Unloading everything did me in for the day.
While mounting the floor panels I hit my left index finger with the hammer. That was the only injury from the whole project. The finger nail turned black and has only recently fully regrown, outlining the timeline of the project.
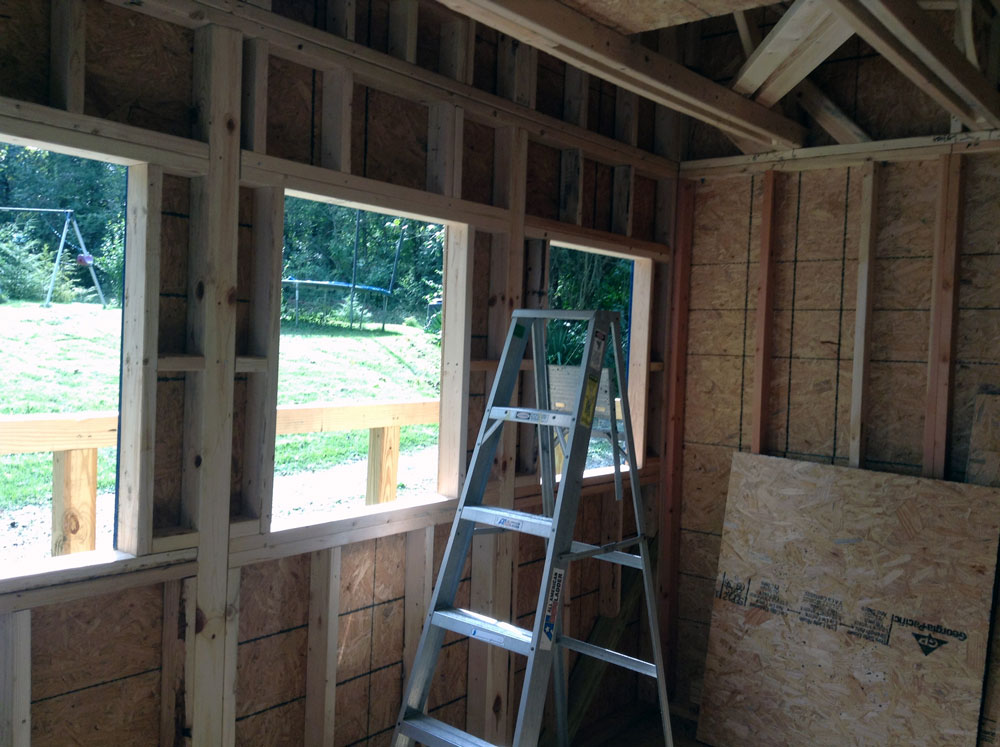
September 5. The rear wall was the easiest to frame. In all of this I can’t emphasize enough that clamps are super important to hold stuff. Also, Dave had borrowed me his pneumatic nail gun. What a time saver.
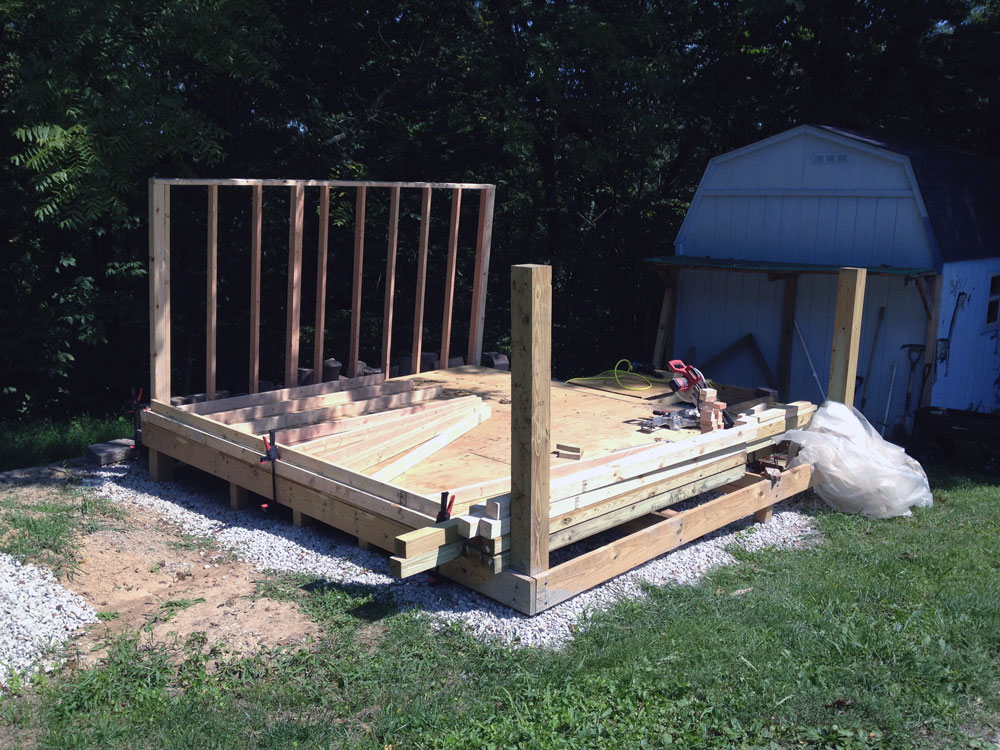
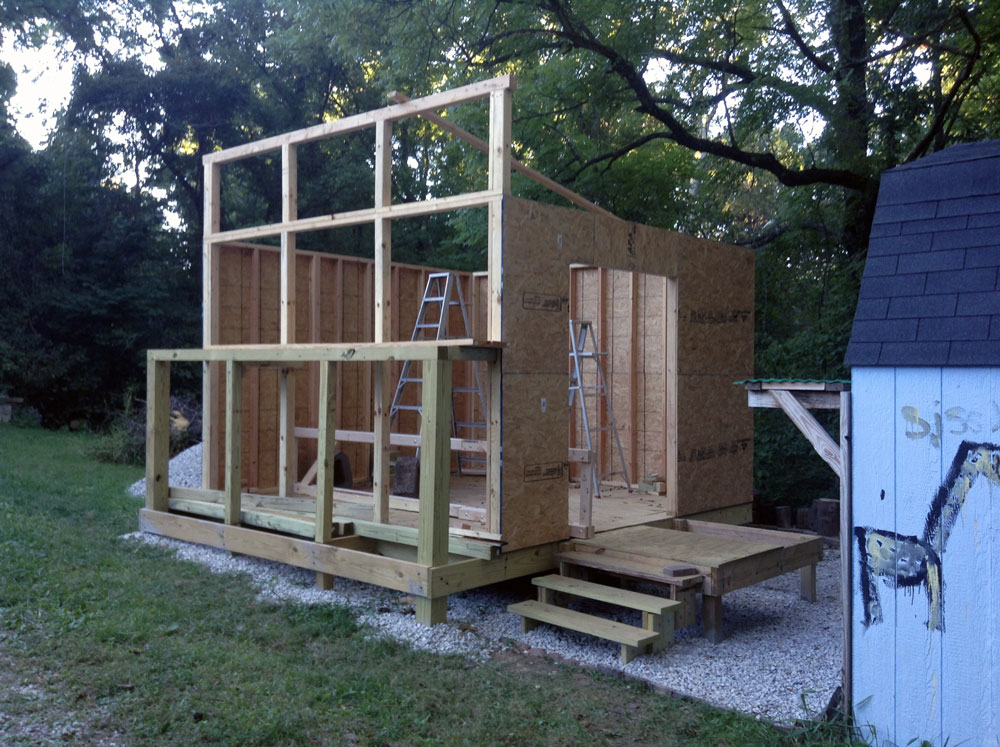
Sepember 6. Wall framing is going smoothly. No wonder, I had the plans and measurements all worked out. I thought I would be done by October….
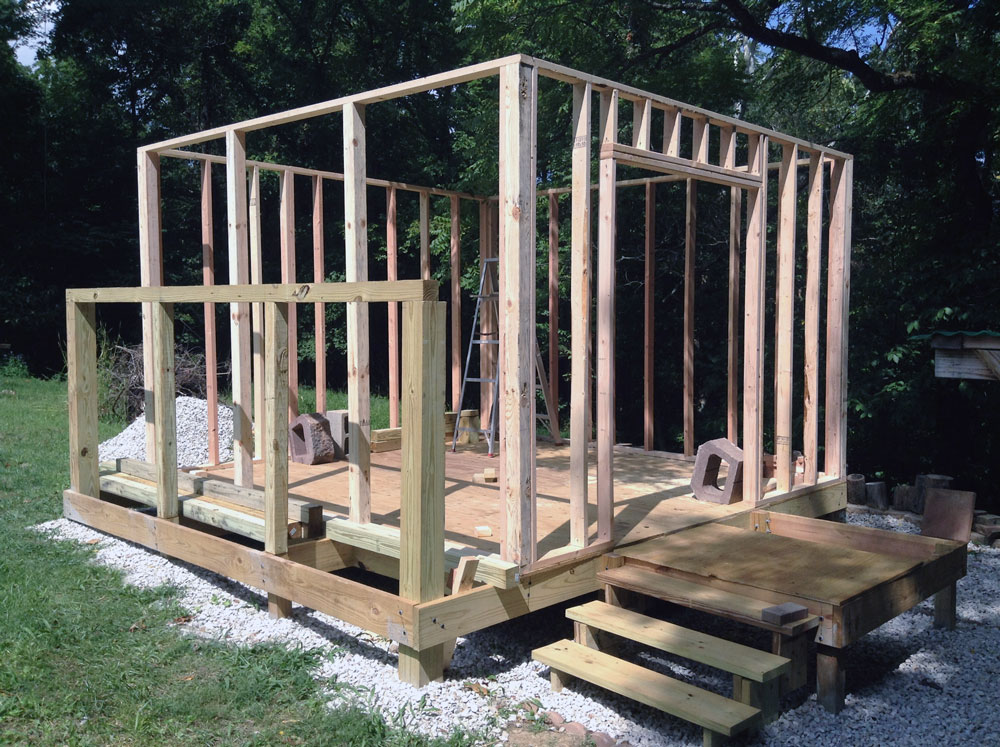
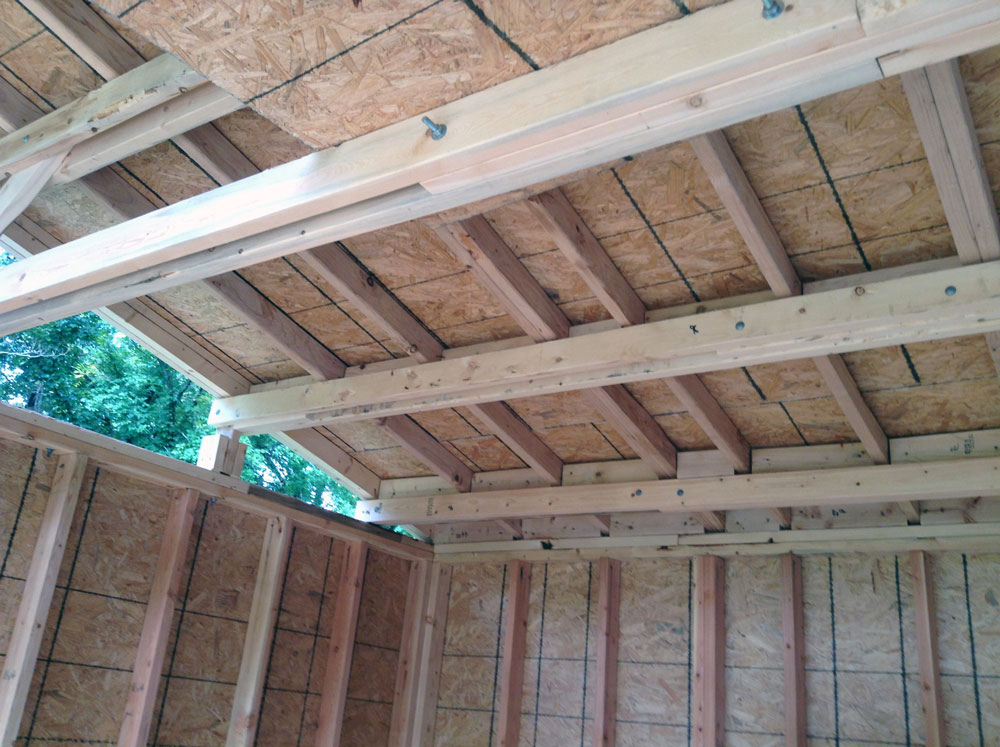
September 12. It was really coming along and felt already pretty stable with the OSB side panels up. At that point I didn’t know yet what was going to happen with the front wall. I thought I might pick up some random used windows and do something creative. Also at that time I realized that the way I had intended to frame the roof was not going to be strong enough. Originally I had 16’ 2×4”’s with no support in the middle. This is where the improvisation started.
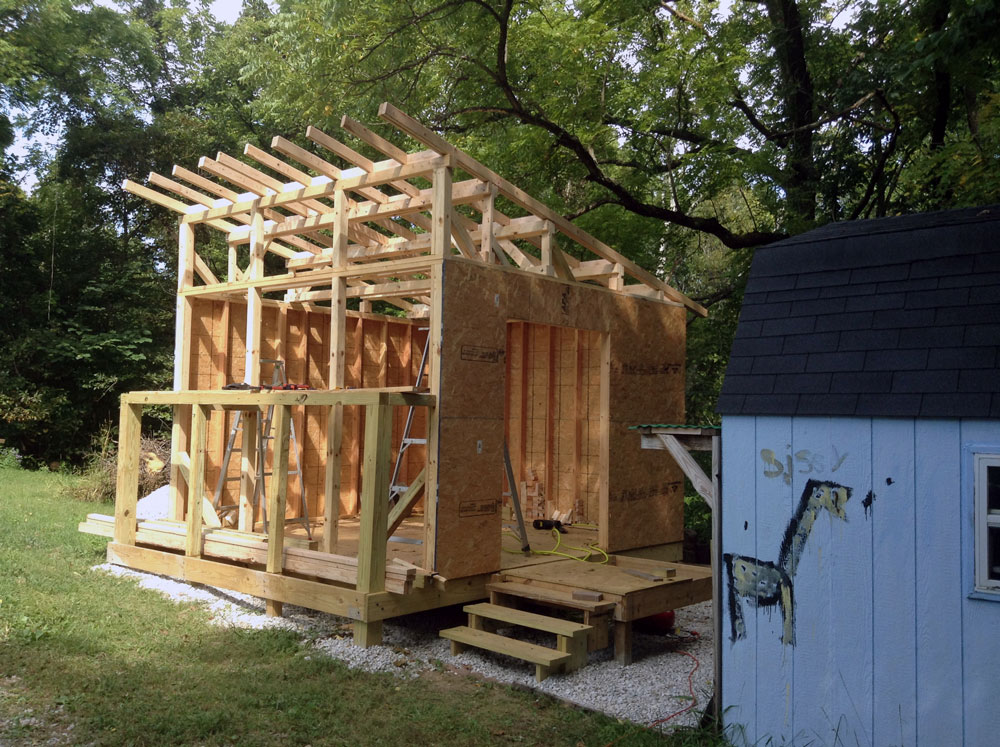
September 15. After two days of building three major cross supports for the roof I realized that there would be a little attic. To come in handy for lumber storage. Also, strong enough to hang a hammock.
September 18. Overall, one of the hardest things in the project was that I only had one pair of arms. While Zack helped me hold a few of the 4×8’ OSB side panels I just couldn’t wait every day until he was home from school. So, clamps again. A whole other adventure were the roof panels. Somehow I had to get four full size and four half size OSB panels on the roof before the next rain (the exposed plywood floorboards started to dislike the little rain we got). 4×8’ OSB panels are not only heavy but also not exactly easy for a single person to carry. Apart from starting the project in the first place figuring out a way to get the panels 12 feet up on the roof was probably the most challenging. I wish I had taken a picture. Where you see the ladder in the picture below, I built a guide at the roof edge using a short 2×4″ and a clamp (see, again). Now I could lean the panel that was going on the roof against the side of the structure and slowly push it up, while climbing the ladder. The critical point was when the center of the panel was balancing on the edge of the roof. One step higher on the ladder, one more push so that the panel was more than half up. Then let go and it would flip up while the guide piece prevented it from sliding down the back. Kinda a dangerous and painful but it worked.
Once I had two panels up I climbed up to nail them down so I had something to sit on. Then I “transported” the rest of the panels up and was so proud of myself. I was going to beat the rain after all. I moved the ladder inside the structure and put all the tools on the roof. Now, when you use a nail gun you want to wear ear muffs to protect your hearing. Also, some safety goggles are good. So my visual and aural senses were well shielded from the outside world as I was nail-gunning away on the roof. It had been cloudy and muggy all day. I was sweat drenched and didn’t realize that a very light rain had set in – until a lightning bolt came down really close (the thunder was almost instantaneous). I was one half panel away from finishing but realized that I had to leave it at that. Luckily, I had a few of my clamps (see, again) up on the roof and was able to clamp the loose panel so it wouldn’t fly off in the storm. There was now one 4×4’ opening in the roof – but the ladder was at another spot, not where I needed it. This was when I would have screamed for help but nobody was home. I had to somehow get off the roof. Eventually, I managed to climb into the rafters and under the roof to the front where I could let myself down. Felt like a monkey.
Some of the improvised roof supports.
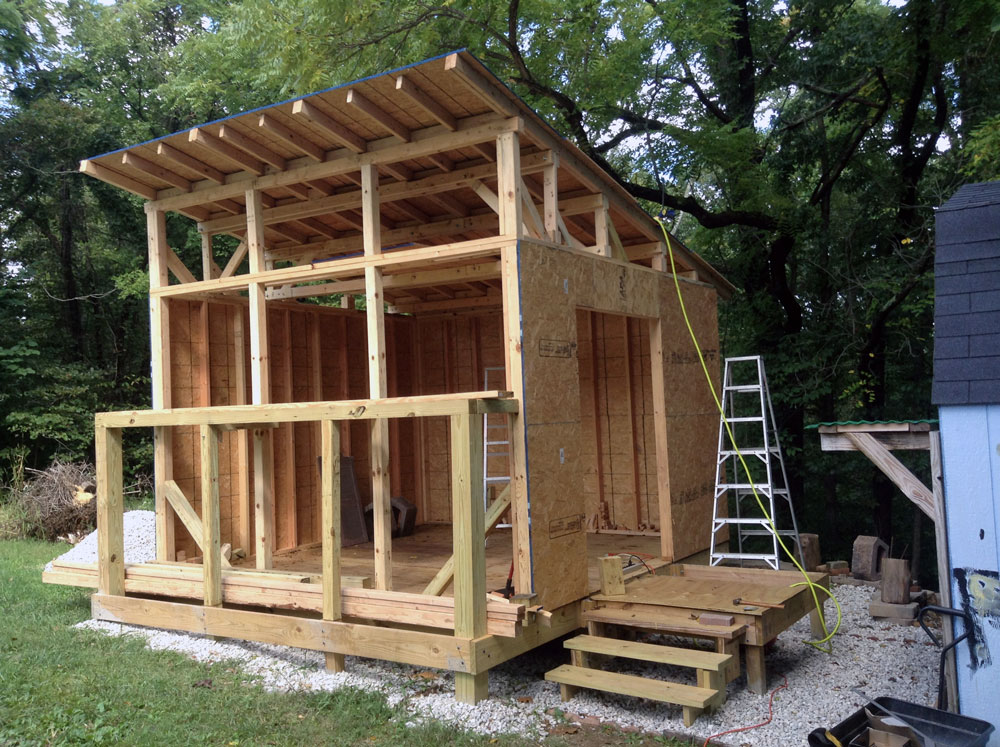
September 23. Finally, it was save to start storing some of the tools and materials under the new roof. Before, I spent every day half an hour in the morning, schlepping air compressor, nailer, miter saw, table saw, etc. From the basement to the construction site. And the same in reverse in the evening.
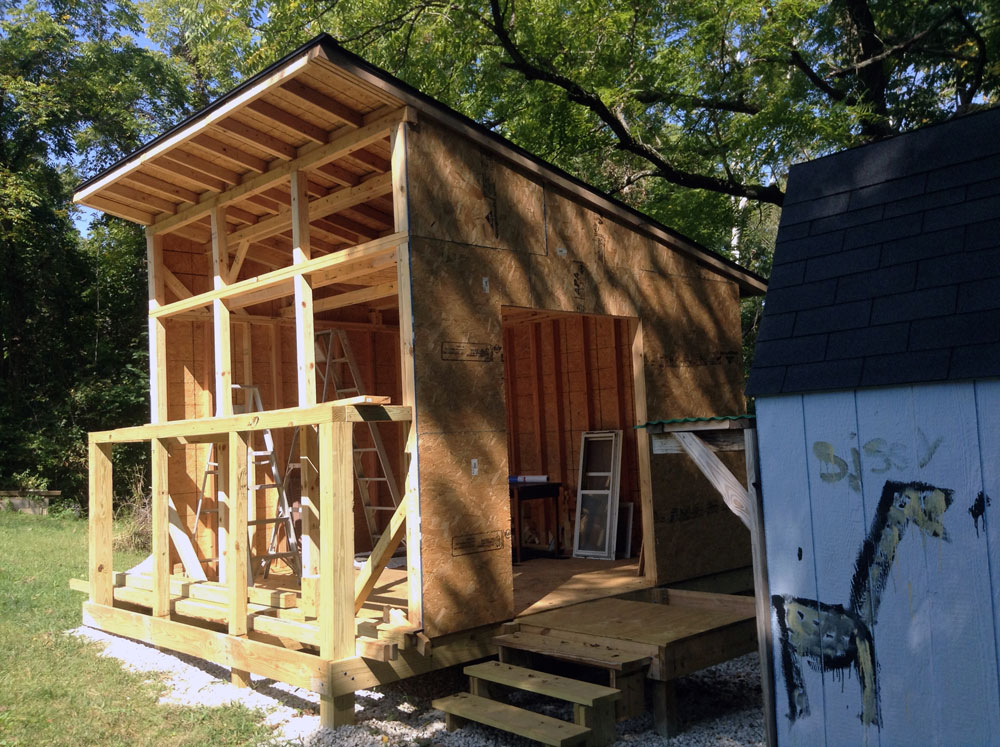
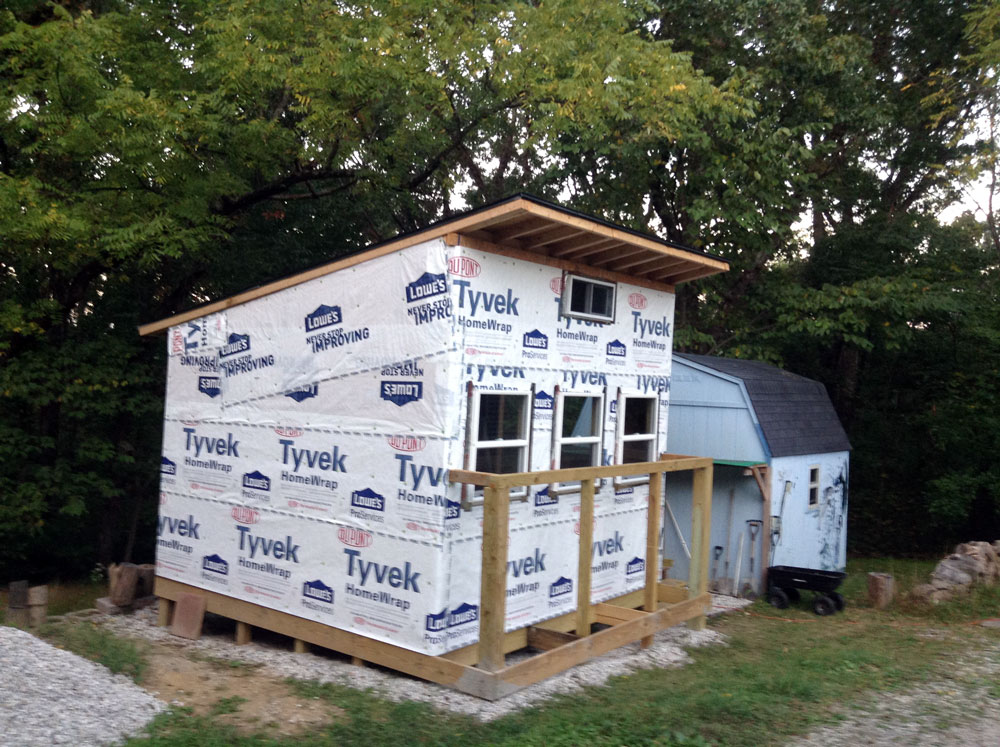
September 27. As I mentioned earlier, I was going to think about that front wall and windows when it was the right time (improvising again). Well, the right time came and I picked up three really nice looking windows plus a cool, large door at the Repo Store in Bloomington. Luckily, it was 50% off sale and with other rebates everything was less than $20. It turned out that the windows were unusable because they required a specific frame that nobody knew where to get from. I picked up three plain vanilla windows that were on sale from the hardware store. Then I started adding some (improvised) framing to the front wall. By the time I had put the panels in I needed a lot more studs – the panels need to be attached to something.
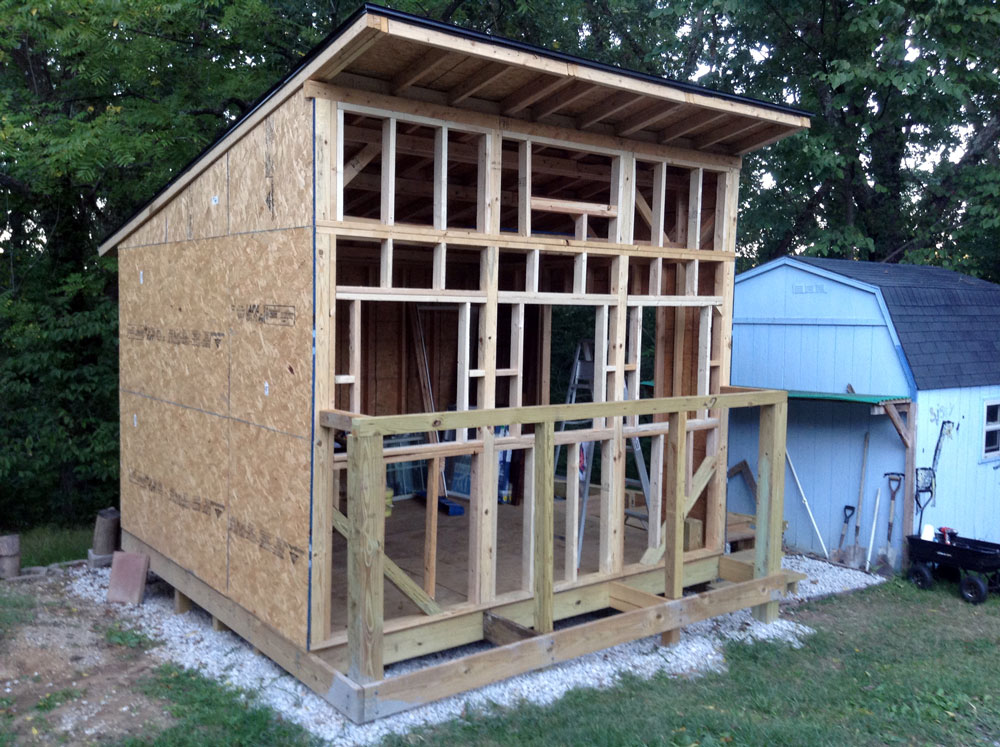
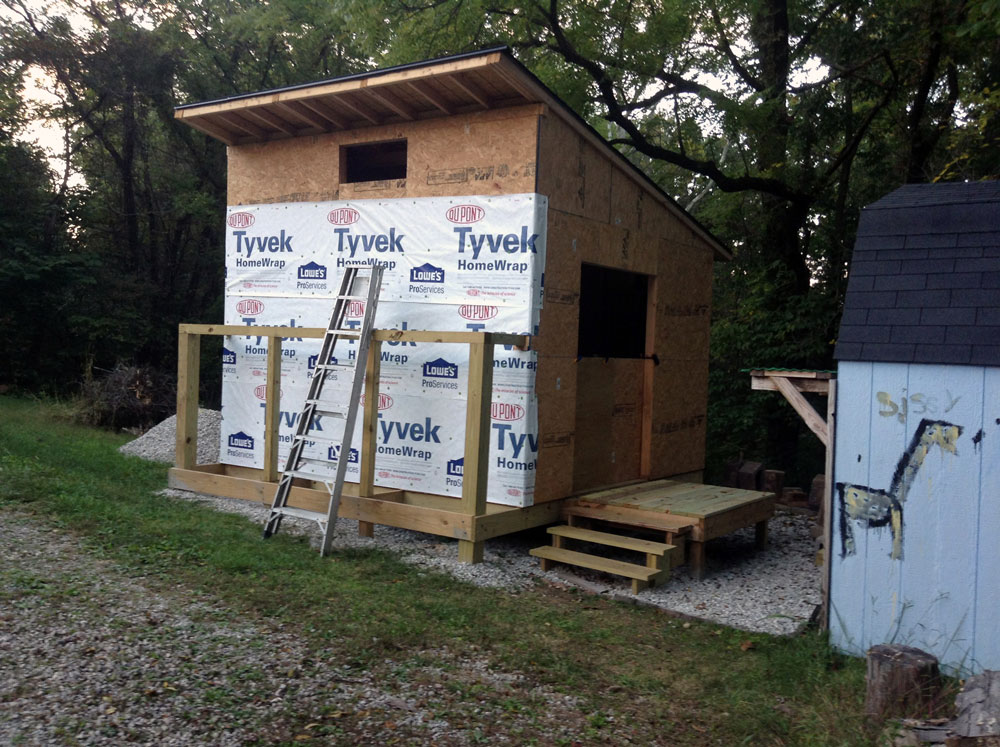
September 29. At last. Fully enclosed (sort of) and a panel blocking the entrance opening so that the cat can’t go in to poop.
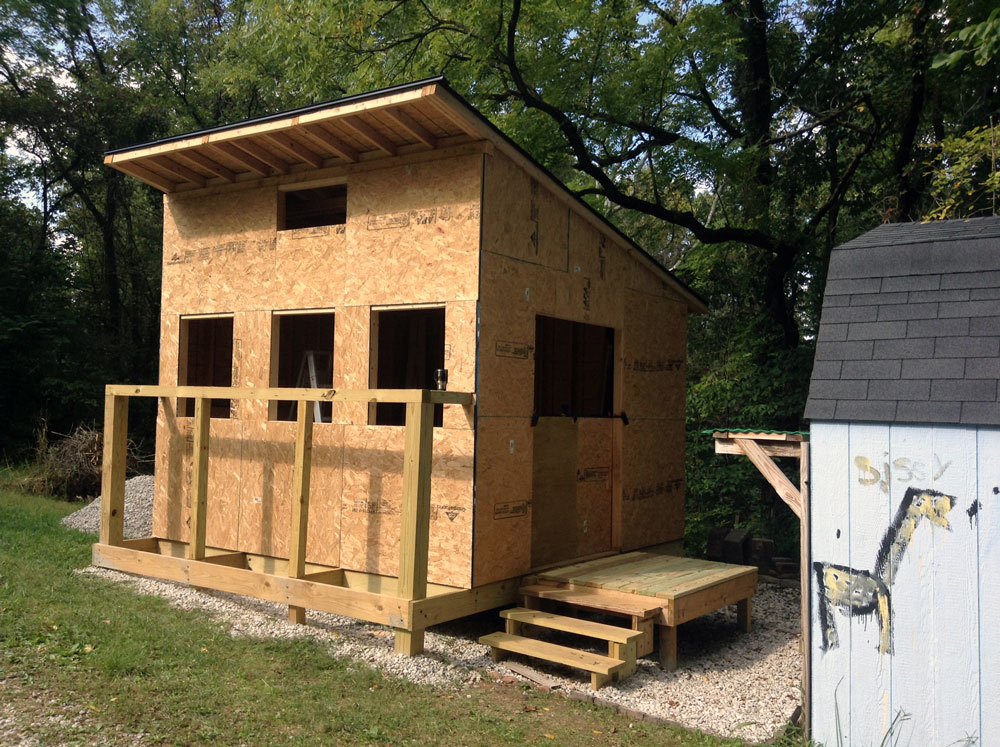
October 2. I had thought that I might be done by early October. But there were so many little and big things to do, still. Since I wanted this structure to be reasonably dry, heatable and comfy (after all, computers and all sorts of electronics are supposed to be in there, not to mention a hammock for the occasional break) I decided to use house wrap. Sounds easy. But again, a single person has to be very creative to find ways to hold these large, slippery sheets in place while putting the fasteners in.
October 5. By the time I started installing the windows the usefulness of that strange front bracing had itself proven again and again. Strong enough to stand on, lay on heavy boards as scaffolding, and accommodate eventual visitors on camels or giraffes.
I had planned on a wider door because I was concerned that my CNC machine wouldn’t fit through. After some measuring I was convinced that this 30” door from the Repo Store would be fine. Actually hanging the door and making it fit was a bit nerve wrecking.
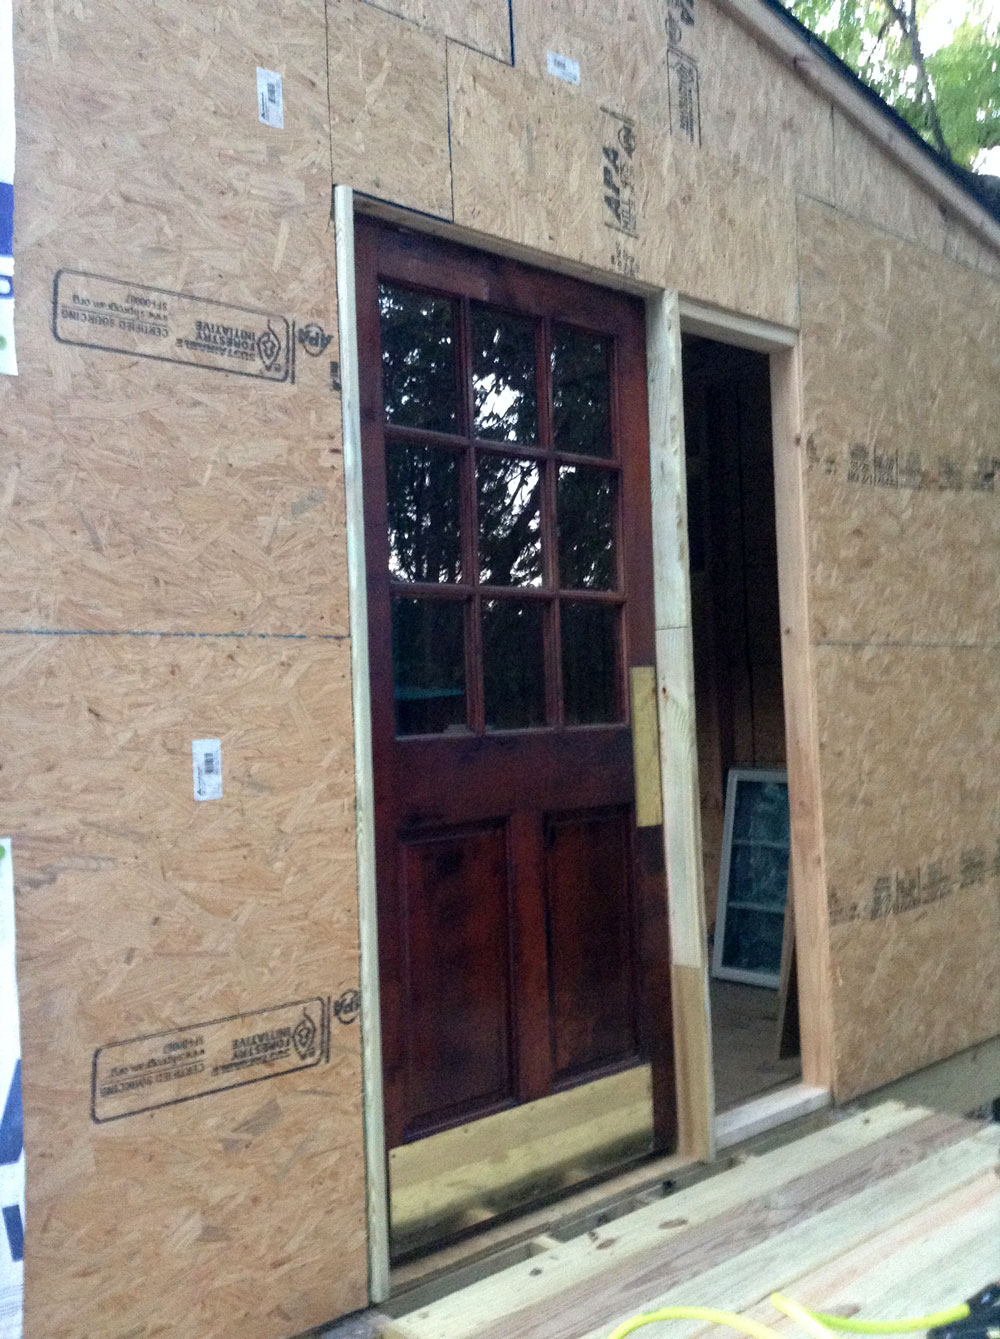
Adding some extra framing and panels to fill the gap by the door finally gave me a fully enclosed space. Another landmark. I thought I would be done within a week or two.
Continued in part 3.
